How to Burn Photo Slideshow to a Playable Blu-ray Disc on PC/Mac
If you are willing to know what made you or other people burn photos slideshow to Blu-ray disc, we have compiled a list of reasons, let's have a look at them:
- Blu-ray disc use to carry HD picture quality.
- Storage capacity is approx 5 times than normal DVD (about 25-50 GB). So you can store quite a large amount of data.
- During the burning process, you can add motion and transition effects such as music, crop, trip, can add theme, etc.
- It also helps you to share the bulk media files easily.
- Provide a platform to be able to play back your photos on TV or DVD player.
- And most importantly you can save your memories under secured medium.
Actually, Blu-ray disc acts like the most trusted media storage medium in today's life, when we have so many things to capture every moment of life, such as digital cameras, smartphones, etc. Now let’s move to the next part to learn more about burning photo to Blu-ray disc.
Part 1. How to Burn Slideshow Created in iPhoto to DVD on Mac
It is always exciting to create and watch beautiful and theme based photo slideshows and using special effects with iPhoto to add additional impression to it. Now post the creation of slides it is time to go and burn those slides to DVD on the Mac system. If are thinking how to go about, then answer lies with Wondershare DVD Creator which is the best photo Blu-ray burner for Mac, which actually acts like a double benefit while burning your slideshow to Blu-ray disc or DVD with various additional features.
Wondershare DVD Creator
- Burn photo slideshow to Blu-ray disc and playback on any playable devices.
- Support any image files, include .bmp, .jpg, .jpeg, .png, .gif and .tif.
- Create photo slideshow Blu-ray disc with 100+ free static and dynamic DVD templates from Sport, Memory to Holiday theme.
- Edit image by applying effect, adjusting transition, adding text, changing background music, and others.
- Make your photo slideshow Blu-ray disc menu special by changing background image, music, text, thumbnail and more.
- Additional functions like burning data disc, ISO to DVD, Video Editor, One-click to burn videos to DVD, DVD/Blu-ray disc to video, DVD to DVD, etc.
- Burn video/photo/audio files to DVD/Blu-ray Disc/ISO File with super fast burning speed and high-quality output.
- Supported OS: Mac OS 10.14 (Mojave), 10.13 (High Sierra), 10.12, 10.11, 10.10, 10.9, 10.8, 10.7, 10.6, Windows 10/8/7/XP/Vista.
 Security Verified. 5,150,814 people have downloaded it.
Steps-by-step tutorail of how to burn iPhone slideshow to DVD on Mac:
Before you start working with DVD burner on Mac, first make sure to send the iPhoto files to the system using the Export option from the Toolbar. Now move on to the following steps.
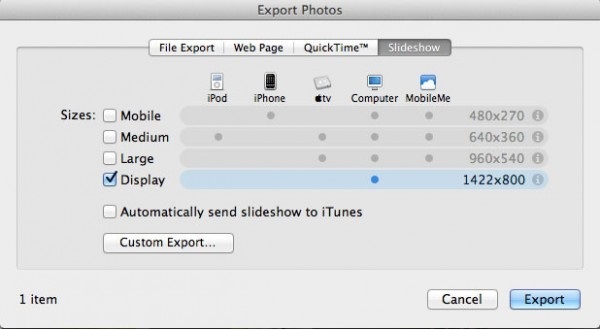
Step 1 Load file and Organize the photos
First, you need to download the DVD creator tool, from their official website and launch it. Once it gets started, from the mentioned options choose to Create a New Project.

Now, use the + button from the center of the interface to load your photo slideshows, within few seconds all photos will get uploaded and be displayed as thumbnails.
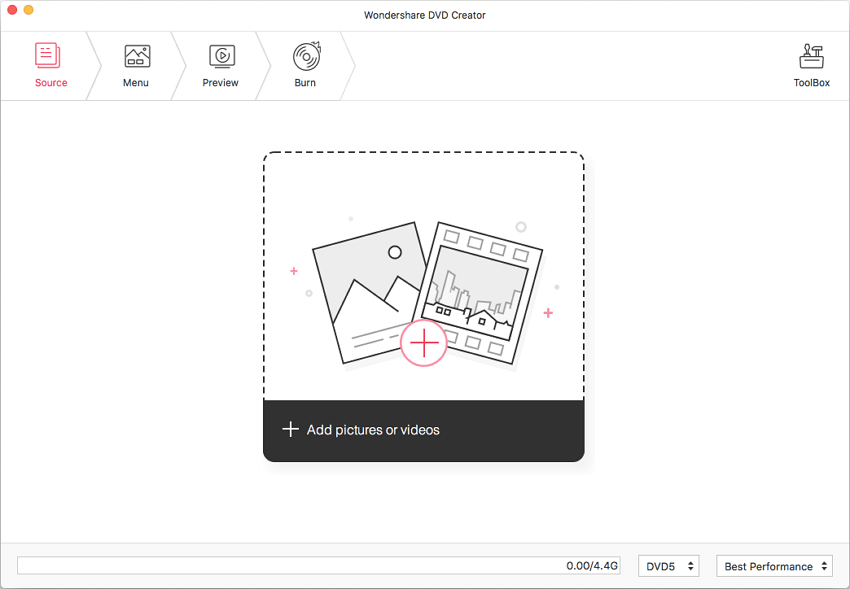


Step 2 Customize the photo slideshow on DVD burner for Mac
Move to the Menu tab to customize your DVD menu. Choose a template design from the provided list on the right column. You can also make further customization such as changing background image or music, adding text, adjusting aspect ratio, and others by hit the icons upon the display window.
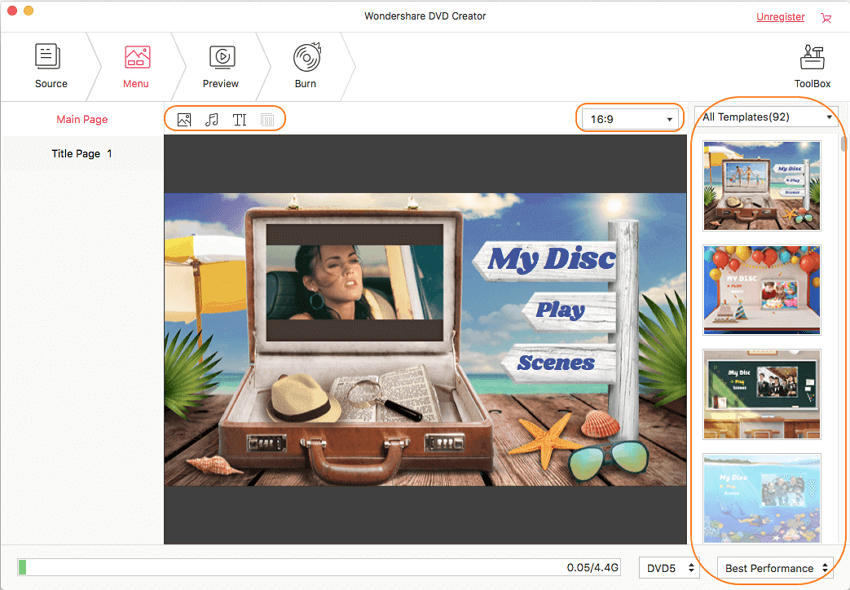
Step 3 Preview and burn your DVD creation
Before moving to the Burn option just have a look on the Preview tab to get a brief idea about how your final file will appear. You can still back to previous steps to make adjustments if needed.
Then inset the disc and move to Burn tab, select output format as Burn to Disc option. Give a Disc Label to it and save other Burn Settings, finally press the Burn button to complete the process of burning photo slideshow to DVD.
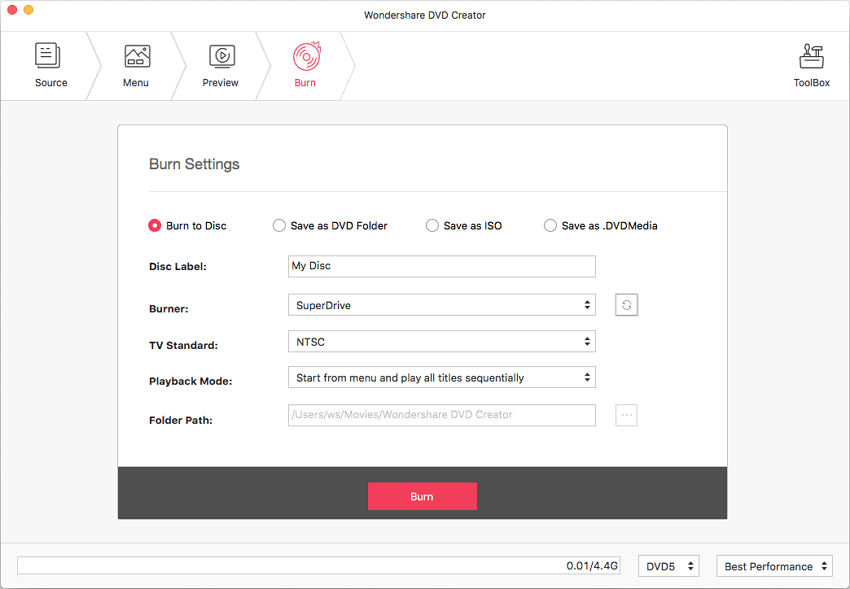
This way you can easily customize your Photo Slideshows and then can proceed to burn to a Playable DVD on Mac System. With this DVD burner for Mac whole burning process goes smooth and work done fast.
Part 2. How to Convert Photo Slides to Blu-ray for Windows
Now the turn goes to Windows system users, for them, the required steps to burn photo to Blu-ray are mentioned as below. Here we are going to Wondershare DVD creator for windows version. The process starts with launching the tool and then choose Create a Blu-ray(BDMV) disc option.
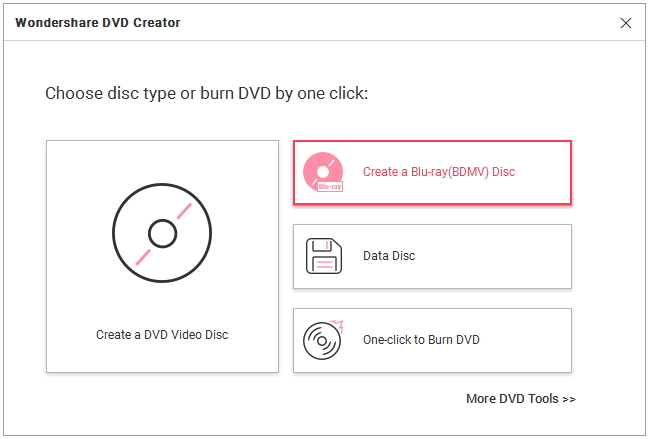
Steps on how to convert photo slideshow to Blu-ray disc on Windows:
Step 1 Import the photo slides
You can add the photo slideshows by either drag and drop option or else using the " + " button under the Source tab on the primary interface.
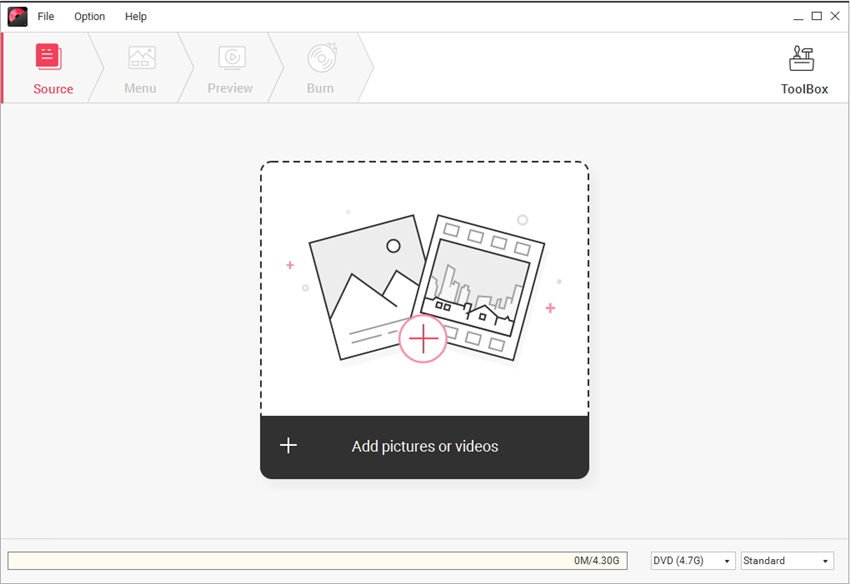
Step 2 Edit photo slideshow to burn to Blu-ray
The loaded photos will be displayed as thumbnail on the left side. Click the pencil-like icon on the thumbnail to make the desired changes to the photos slideshows in terms of filters, text writing style or message, any music or transition effect, font style, size of text, its color etc. Then apply those changes to all and confirm it.
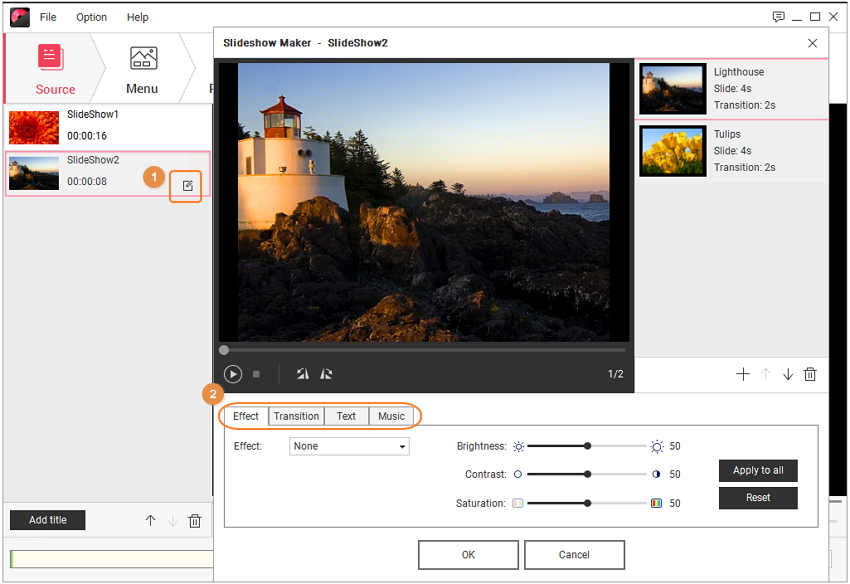

Step 3 Customize slideshow Blu-ray disc menu
You also have various disc menu options to choose from, such as template with moving/dynamic or static ones, modified background by adding additional images or themes, background songs etc. All these options appear after visiting the Menu tab. Customize the background, music, text, and thumbnail from the page top submenus, and from the right side you can choose desired templates.
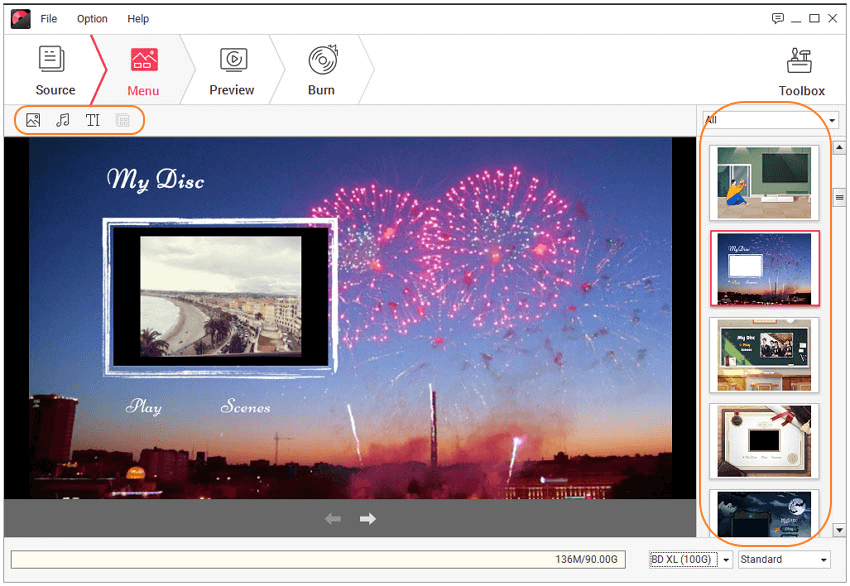
Step 4 Preview and burn Blu-ray disc
After done with all the changes, just go to the Preview tab to check your photo slideshow. Back to the previous options to make any adjustment if you're not satisfied.
Finally, switch to the Burn tab. Choose Burn to disc option or Save as BDMV folder, and complete Burn Settings such as Disc Label, Burner, Encoder, Resolution and others. Click the Burn button to start burning photo slideshow to Blu-ray disc, and you can play and watch on either Blu-ray player or on big screen TV after finished.
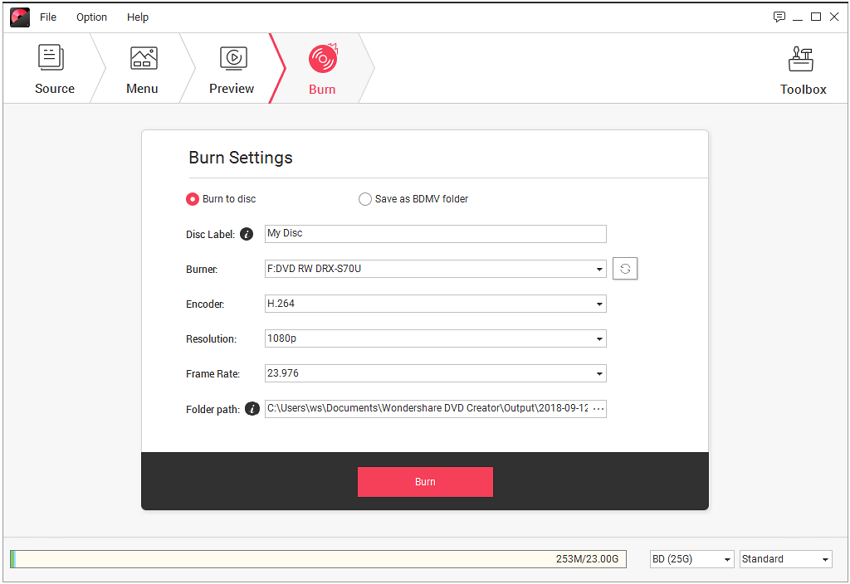
Following the above process for burning the photos slideshow to Blu-ray will make it quite easy for you to go for watching all photos under one Blu-ray disc with High Definition quality and various interactive features. Also, you can use it for various purposes too such as sharing or gifting it to loved ones, friends, family members to make their memories alive.
Video Tutorial of How to Burn Image Slideshow to DVD on Windows, Similar to Mac
It is always advisable to keep safe-keep your favorite memories in terms of those photo slideshows that keep a special place in itself. Thus, making it easier to keep your photos safe this article informed you the process through which you can burn the photo slideshows into a playable Blu-ray disc for both Mac and PC. So, without going here and there just stick to the guide to get the best result in terms of saving beautifully designed photo slideshows and play them as per your convenience after burning them to Blu-ray disc.


Christine Smith
staff Editor
Comment(s)