Get Started
To facilite your use of Wondershare DVD Creator, Below lists 4 essential parts for you to get a quick start: Install, Register, Quick Overview and Basic Settings. There're both Windows and Mac version for Wonderhsare DVD Creator and we take Windows version for the whole instructions, note that Mac version shares the same guidance unless otherwise stated.
Watch Video Tutorial to Get Started of Wondershare DVD Creator
Part 1. Download & Install
Step 1 Download Installation Package
Download the corresponding version of Wondershare DVD Creator to your computer based on the operating system.
Step 2 Install Wondershare DVD Creator
Double-click and run the setup file, select your preferred language and click OK to proceed.

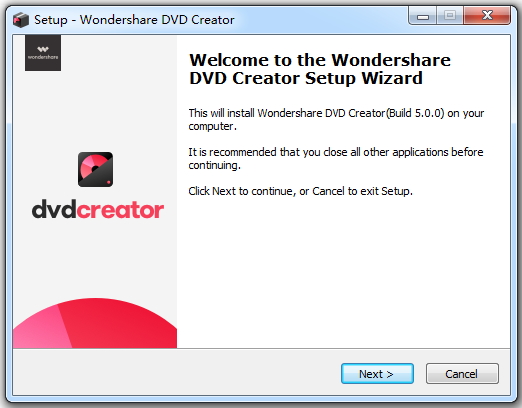
You'll get the Setup Wizard, click Next to continue.

Read the License Agreement carefully and check the box I accept the agreement before clicking Next to move on.

Now specify a destination folder to save the program file and click Next to proceed.

Select the additional tasks you would like Setup to perform while installing Wondershare DVD Creator, Create a desktop icon or Create a quick launch icon, then click Next.

After that, confirm your Setup settings and click Install to continue with the installation.

Step 3 Launch Wondershare DVD Creator
When the installation completes, you’d receive a window as the screenshot shows. Just click Finish to exit Setup and launch Wondershare DVD Creator right away.

Part 2. Purchase & Register
If you're the free trial user of Wondershare DVD Creator, you'd have following restrictions. Click Buy Now to purchase a license and enjoy the full feature.

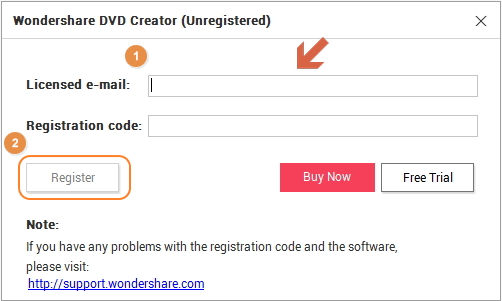
After that, click Register to get a pop-up window for registration. Rightly enter the Licensed e-mail and Registration code, click Register to activate the registration.

Note that you can also click ![]() in the top right to buy the license code and hit Register as circled to complete the registration.
in the top right to buy the license code and hit Register as circled to complete the registration.

Or just go to Help menu > click Purchase and Register in turn to get the full version of Wondershare DVD Creator.

Part 3. Quick Overview
Launch Wondershare DVD Creator, you'd get the launch page as below, which consists of Create a DVD Video Disc, Create a Blu-ray(BDMV) Disc, Data Disc, One-click to Burn DVD and More DVD Tools >> 5 parts.


Note the launch page of Wondershare DVD Creator for Mac contains Create a New Project, One-click to Burn DVD, Open an Existing Project and More DVD Tools >> 4 parts.
- Create a New Project functions the same as Create a DVD Video Disc in Windows.
- One-click to burn DVD supports quick DVD burning just as Windows version.
- Open an Exisiting Project enables you to resume editing recent project files for DVD burning.
- More DVD Tools >> offers One click to Burn DVD Disc, Video Editor and Photo Slideshow 3 bonus features.

1. Create a DVD Video Disc
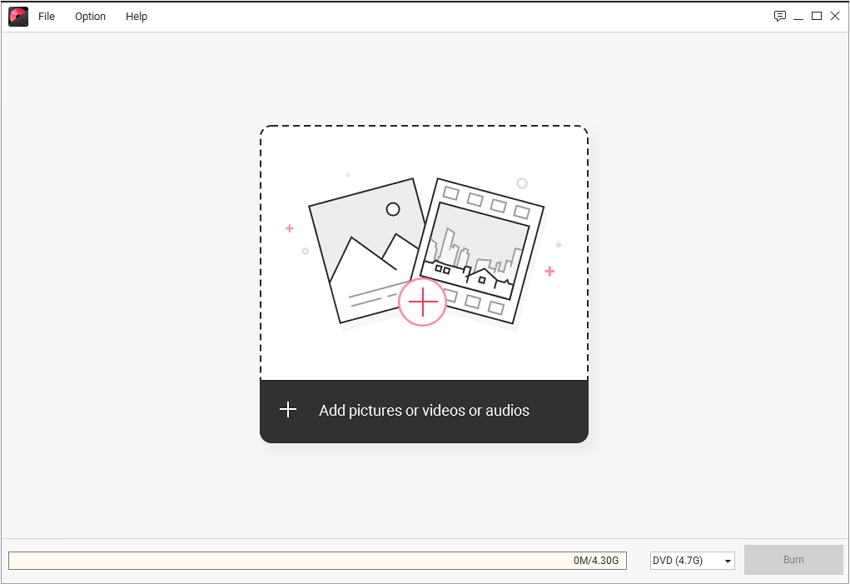
Click Create a DVD Video Disc and you'll get the primary interface of DVD disc burning.

2. Create a Blu-ray(BDMV) Disc
Click Create a Blu-ray(BDMV) Disc and you'll get the primary interface of Blu-ray disc burning.

3. Data Disc
Click Data Disc and you'll get the primary interface of Data disc burning.

4. One-click to Burn DVD
Click One-click to Burn DVD and you'll get the primary interface of one-click DVD burning without menu settings.

5. More DVD Tools
Click More DVD Tools and you'll get the primary interface of the built-in toolbox, which is made up of Data Disc, ISO to DVD, Video Editor, Slideshow Maker, One-click to Burn DVD Disc, One-click to Burn Blu-ray Disc, DVD to DVD, DVD to Video and Blu-ray Disc to Video 9 powerful functions.

If you're using Wondershare DVD Creator for Mac, you'd notice the toolbox consists One click to burn DVD disc, Video Editor and Photo Slideshow 3 bonus features only.

Note: macOS version does not support creating chapters.
Part 4. Basic Settings
As you can see from the primary interface, there're 3 menus in the top left corner: File, Option and Help. To make the best of Wondershare DVD Creator, it's necessary for you to learn what role each menu plays.

1. File Menu
Click File to deal with your DVD/Blu-ray files.

- New: Create a new DVD or Blu-ray project.
- Open: Open history project file.
- Save/Save as: Save edited video or image files to project files.
- Add Files: Add pictures or videos for DVD or Blu-ray burning.
- Add from phone: Add videos and images from phone or camera directly.
- Open Recent: Open recent project files.
- Exit: Close the program.
2. Option Menu
Click Option to choose decoding mode, select program language and the update frequency just as the screenshot shows.

3. Help Menu
Click Help to get self-assistant services.

- Online Help: Search common product FAQs online.
- Support Center: Jump to support page to access user guides, resource, etc.
- Contact Customer Service: Get professional technical support.
- Register: Sign in the purchased license code to enjoy the full feature.
- Check for Update: Check the current version for timely update.
- Product Page: Jump to official page for you to learn the product detail.
- Survey: Send back your feedback, demands or expectations on the future releaase.
- About: Learn more details of Wondershare DVD Creator.


