
How to Burn Image to DVD
Want to make photo slideshow for wedding, anniversary or graduation for easy sharing with family and friends? Read on to learn how to burn images to DVD within simple steps.
Watch Video Tutorial to Learn How to Burn Image to DVD
Part 1. How to Burn Image to DVD
Step 1 Choose DVD Disc Tab
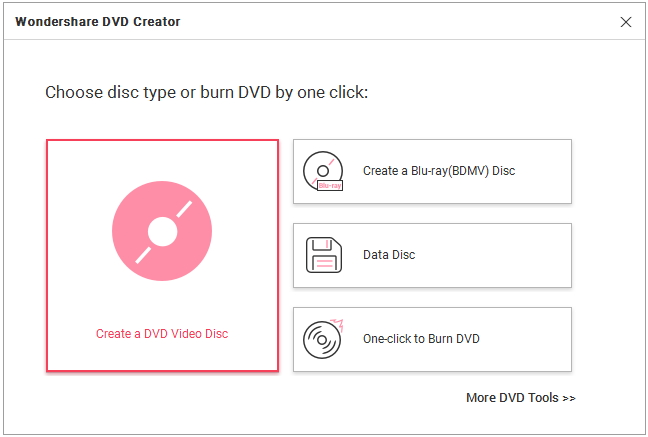
Download Wondershare DVD Creator and launch it after installation, you'd get a prompt as follows and select Create a DVD Video Disc.

Step 2 Add Photos to Wondershare DVD Creator
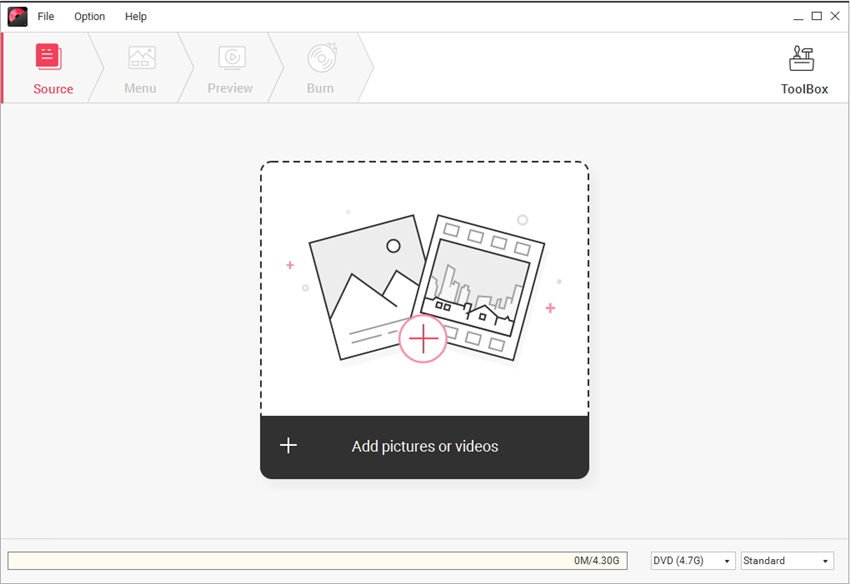
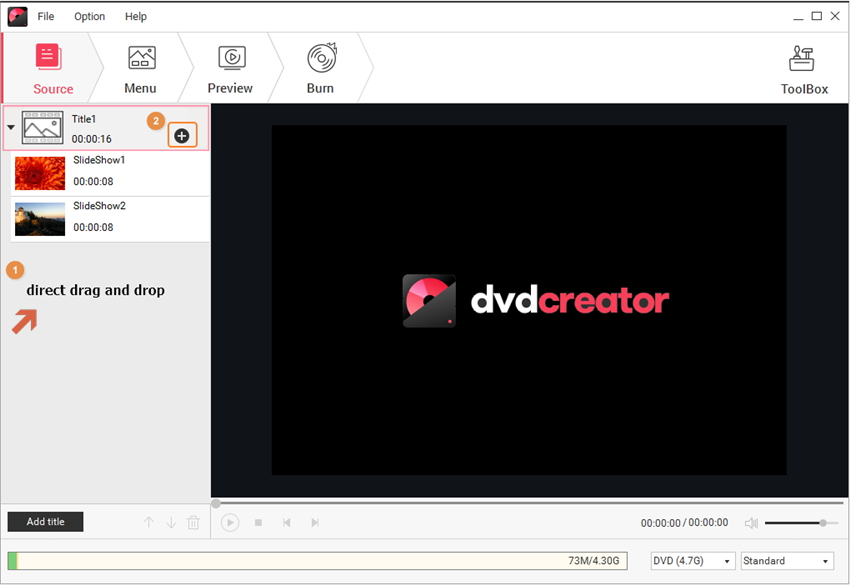
Then you’ll come to the primary interface under Source tab, click ![]() to add your target pictures from local PC.
to add your target pictures from local PC.
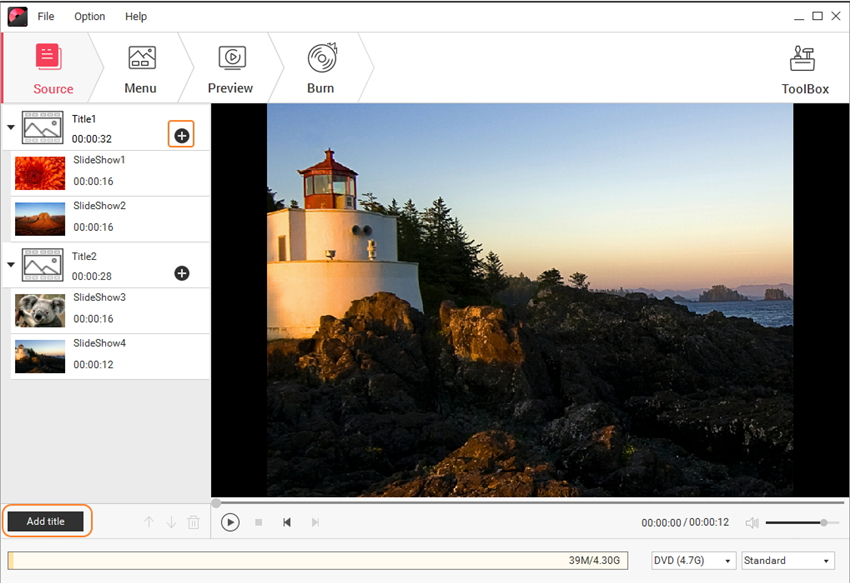
The loaded photos will be displayed in thumbnail and click ![]() would allow you to add more images to the title. If you want to add new title pages for the photo slideshow, just hit
would allow you to add more images to the title. If you want to add new title pages for the photo slideshow, just hit ![]() . Note there's no limit to the number of titles or chapters, feel free to add files as you like.
. Note there's no limit to the number of titles or chapters, feel free to add files as you like.
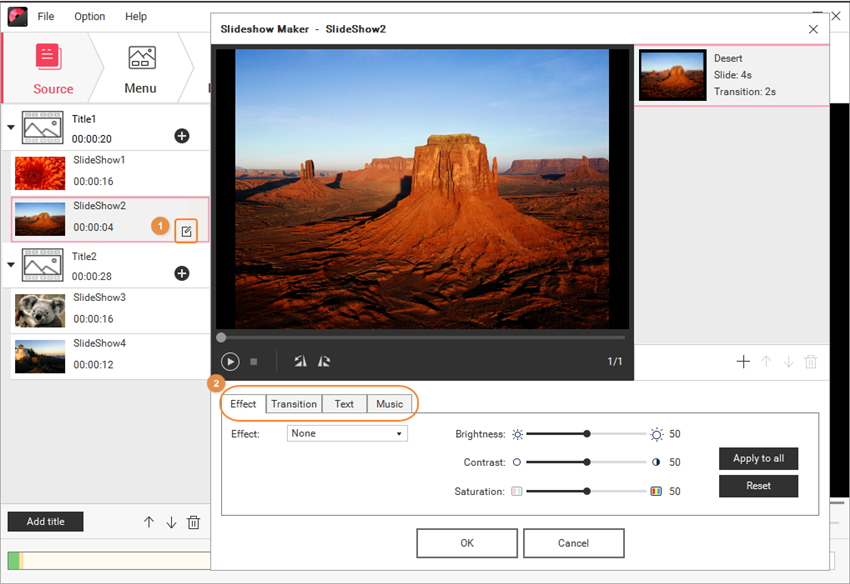
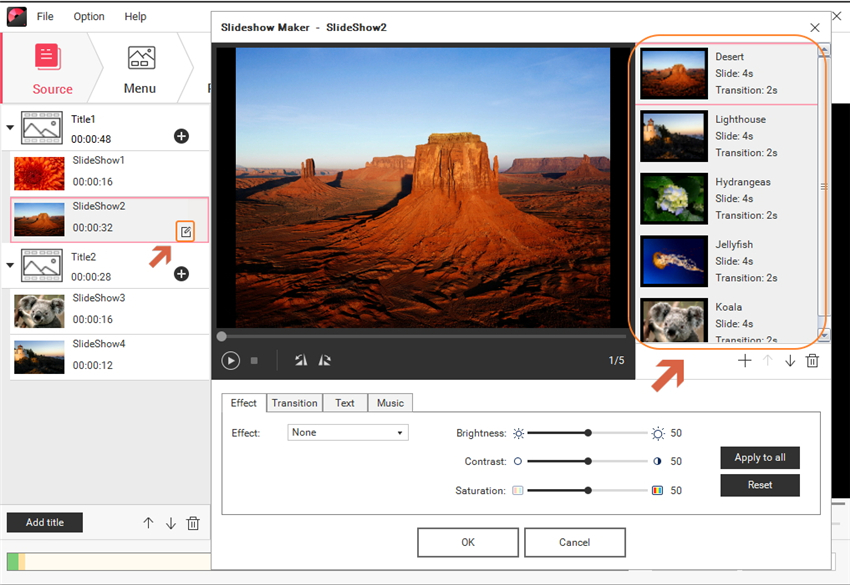
Clicking ![]() allows you to edit the photo to your preference via apply effect, add text, adjust transition settings and add background music. You can go to Edit photos for more details.
allows you to edit the photo to your preference via apply effect, add text, adjust transition settings and add background music. You can go to Edit photos for more details.
Step 3 Select Templates & Customize DVD Menu
Now switch to the Menu tab, where you can view the Menu Structure and select Templates.
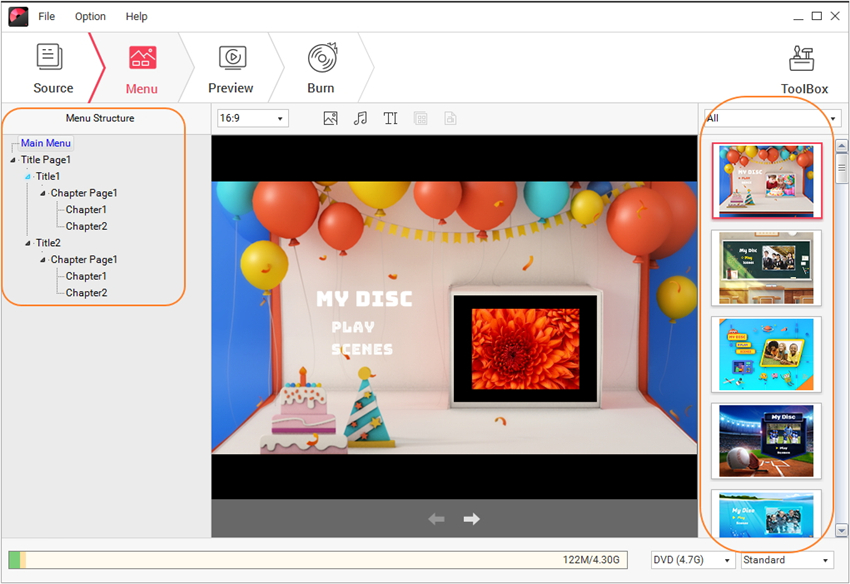
Once you’re done with the template, it's time to adjust your DVD Menu from the following 5 aspects.
-
Change Chapter Frame: Click
 and you’ll get a list of Frame options in the right. Double-click it will change to the chosen frame.
-
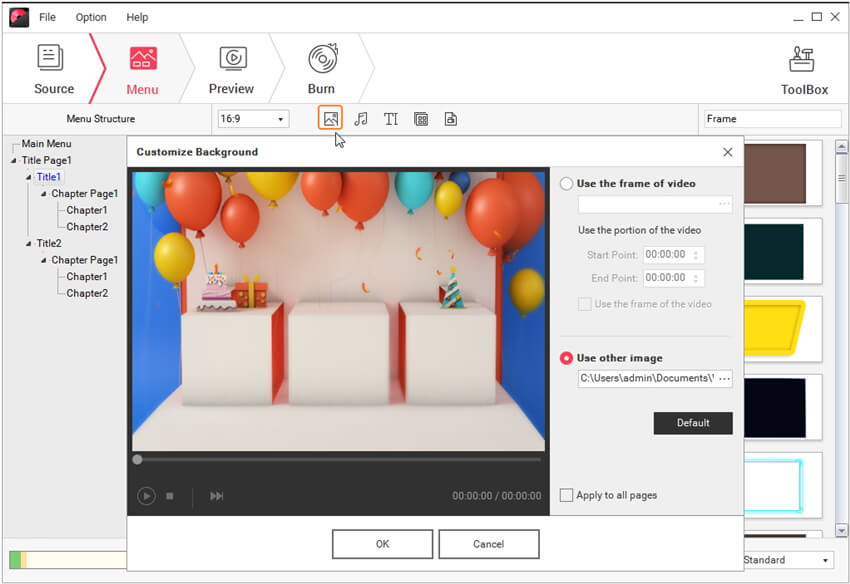
Customize Background: Clicking
 permits you to change the template background to other images.
-
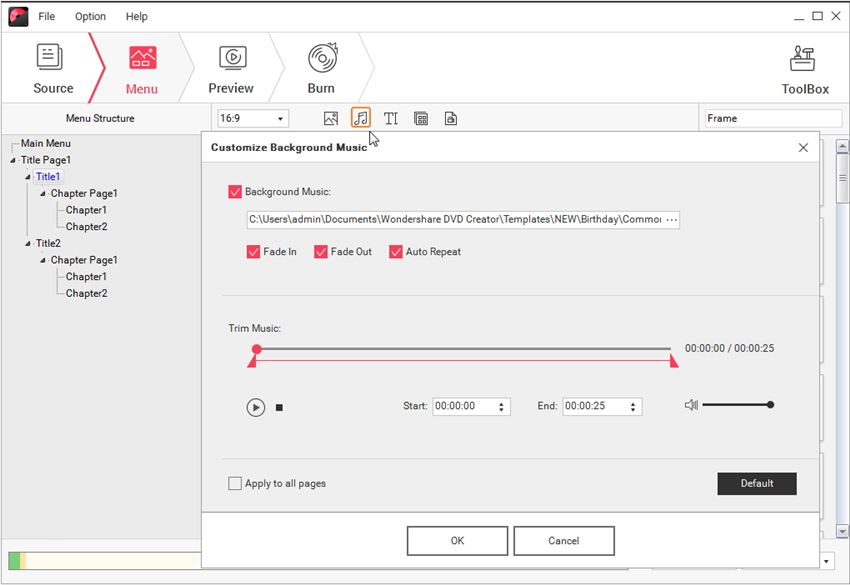
Customize Background Music: Click
 and you'll be able to change the background music to your favorites. Note that it supports fade in, fade out and auto repeat 3 sound effects as well as trimming function, make the best of them!
-
Add Text: Click
 and you'll be able to add text to the template for better illustration. You can set the font, font size, font color, etc. as the screenshot shows.
-
Customize Thumbnail: Select chapter thumbnail and click
 , then you can freely customize thumbnail as you like.


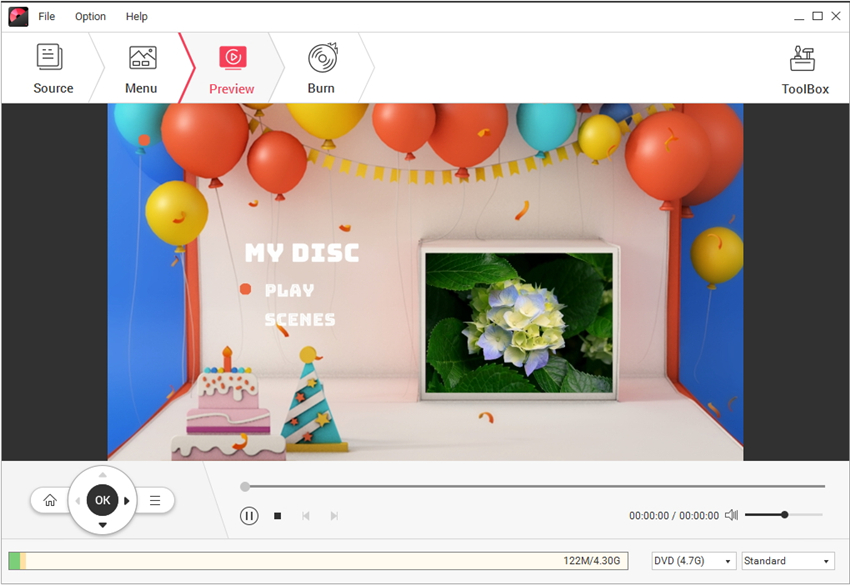
Step 4 Preview DVD Photo Slideshow
When you’re satisfied with above Menu settings, just proceed to the Preview tab to view your DVD creation. If you’re not happy with it, just return to Menu tab and make changes.
Step 5 Burn Images to DVD
Here comes to the final step, go to Burn tab and you'd get the interface as follows.
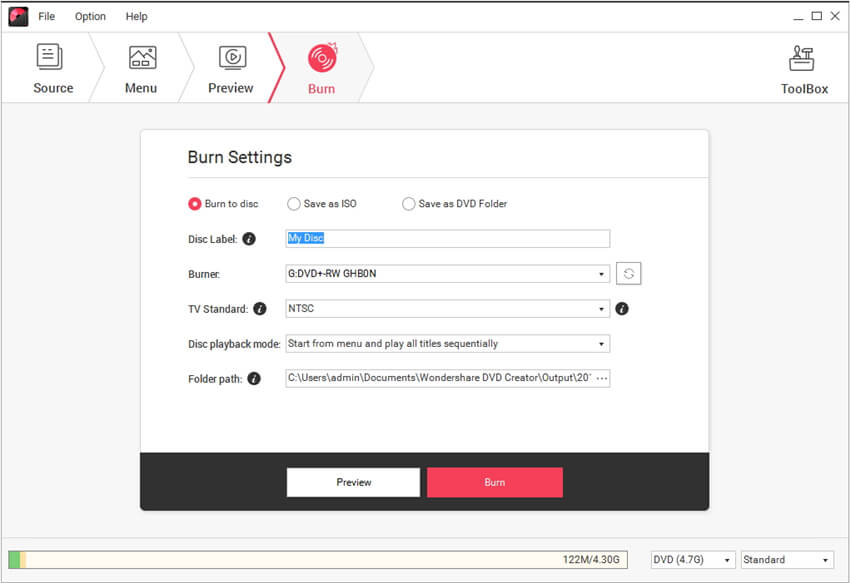
Choose Burn to Disc if you insert the DVD to PC, or Save as ISO in case of no DVD disc at hand. Then complete the remaining options, select the DVD type and quality in the bottom right and click Burn to start burning photos to DVD disc or ISO format files.
Part 2. How to Batch Add Pictures for DVD Burning (Optional)
If you want to add multiple pictures to Wondershare DVD Creator, you can either drag-and-drop those photos to the program, or click ![]() to select your target images with Shift key pressed. Then you can see the picture thumbnail displayed in the left.
to select your target images with Shift key pressed. Then you can see the picture thumbnail displayed in the left.
Note that the batch added pictures will be included in one slideshow, click ![]() would display them all. Then you can select either one for further editing like add text, adjust transition settings and add background music.
would display them all. Then you can select either one for further editing like add text, adjust transition settings and add background music.
Note: macOS version does not support creating chapters.


