

How to Burn Blu-ray Data Disc with Best Blu-ray Data Backup Software
A Blu-ray disc is the most prominent disc media that is mainly used to for movies and videos. There are some advantages that Blu-ray disc offers which make them a better choice than the simple DVD discs. As the technology is overtaking all the other type of discs, we are going to discuss how we can burn data to Blu-ray disc with an easy way. In this article, you will get to know certain advantages that Blu-ray disc has over another disc media and Blu-ray data backup software. In this article, we are going to discuss how to burn a data DVD in Windows 10, 8, or 7. No matter which version of Windows you are using, you can either choose their default burner or use the DVD burning software we are introducing in the article.
Part 1. Best Way to Burn DVD Data Disc in Windows 10/8/7
To burn data DVD Windows 10 or any other Windows version, you will need software which is capable of burning any kind of file to the data disc without losing the quality of the data. The Wondershare DVD Creator is the perfect solution for this.
The software is specially designed to allow the users to burn the various data files to the DVD and another type of data storage media. The Wondershare DVD Creator is the tool that is a one-stop solution for your DVD burning requirements. With this software, you will be able to create a DVD disc that can be played on the DVD player and other computers. The software has a simple and smart interface that makes the burning process easy to understand. It is a simple yet powerful tool that can also perform some additional functions.
Wondershare DVD Creator
- · Convert data disc to DVD/Blu-ray Disc/ISO File/DVD Folder/Data Disc with fast speed and high-quality output.
- · Edit videos with features of cropping/trimming/rotating videos, add subtitle, apply effects, and others.
- · Select DVD menu with 100+ template design from Movie, Memory, to Travel theme.
- · Customize DVD menu with parameters such as background image, music, text, and others.
- · Additional functions including ISO to DVD, Data Disc, Video Editor, Slideshow Maker, DVD to Video, DVD to DVD, One-click to Burn DVD, etc.
- · Both DVD5 and DVD9 disc are available.
- · Supported OS: Windows 10/8/7/XP/Vista, Mac OS 10.14 (Mojave), 10.13 (High Sierra), 10.12, 10.11, 10.10, 10.9, 10.8, 10.7, 10.6.
Watch Video Tutorial to Learn How to Burn Data Disc to DVD with Wondershare DVD Creator
The key features provided in the software are given below:
- • The software can directly burn multiple videos, photos, and music files all at once.
- • The format support of the software is also vast; it supports more than 150 formats of files.
- • It allows the users to perform editing on the photos and videos before they are burned to the Data disc.
- • It consists of 8 other sub tools comprising of Slideshow Maker, Video Editor, Chapter Creator, and others.
How to Burn DVD Data Disc to DVD with Wondershare DVD Creator
Step 1. Go to the official website of Wondershare DVD Creator and download the software. Install it on your computer and launch it and click on the Data disc burning option.

Step 2. Now, in the next screen, you will see a big ‘+” icon that can be used to import the data files to the software’s interface. You can also use the drag and drop method to load the files into the software.

Step 3.You can add multiple files at once irrespective of their formats. You can also delete the files if you want to. You will be able to see how much space is left on the disc that can be used to store the files.

Step 4. Now, all there is left to do is to burn the files to the data DVD. But before tapping on Burn, choose the disc type, label, and burner and then click on the Burn option.

All the files will be burned to the Blu-ray disc. There is also one other method to burn Blu-ray disc. The process mainly differs in the navigation process. In case you don’t have a Blu-ray DVD available but you want to burn the files then you can also save the files as BDMV folder in any location on your system. You can transfer the files to the Blu-ray disc later on. The software will burn all the files to the data DVD as soon as possible. Make sure that you insert the DVD into the system before you start the process instead of inserting it in between the process.
Part 2. How to Burn Data DVD in Windows 10 with File Explorer
People look for third-party software for their Windows 10 to burn data without even realizing that their file explorer can do it for them. The Windows users do not need to rely upon additional software to burn the data as the Windows File Explorer is capable enough of doing it on its own.
The systematic guide on how to burn files to data DVD with Windows 10 File Explorer is given below:
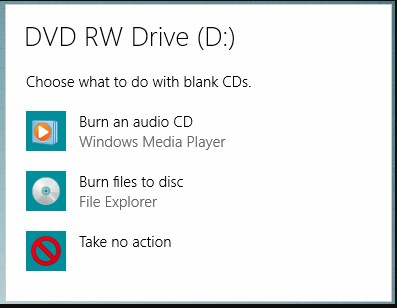
Step 1. Place the DVD into the drive and wait for the Windows to detect it. You will see a notification on the screen. Tap on that notification to start the process.

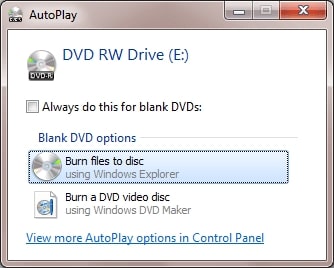
Step 2. When you will tap on the notification, some other options will appear which includes Burn files to disc. Select that option and proceed further.
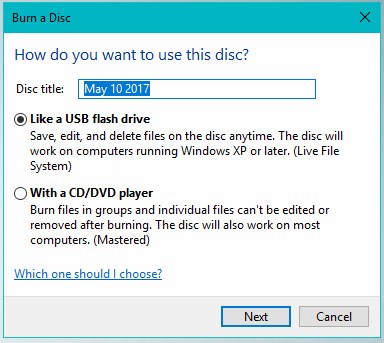
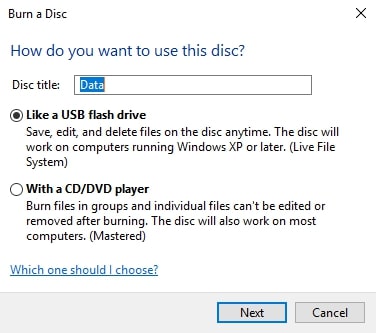
Step 3. A Burn a Disc window will show up in which you can write the Disc title and select the option how you want to burn the disc. Choose the "With a CD/DVD player" and tap on Next button.
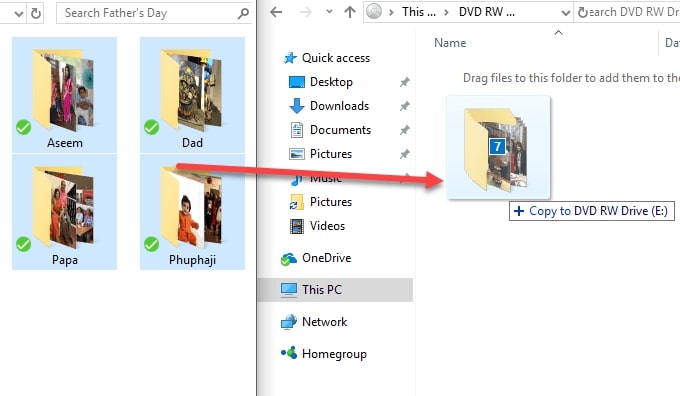
Step 4. In the next screen, a window will appear where you will need to drag the files that you want to burn. Press the Windows button + E keys and a new window of File Explorer will open up. You can now select the file and drag the file to the other window. You can also use the Copy-Paste method to transfer the files.
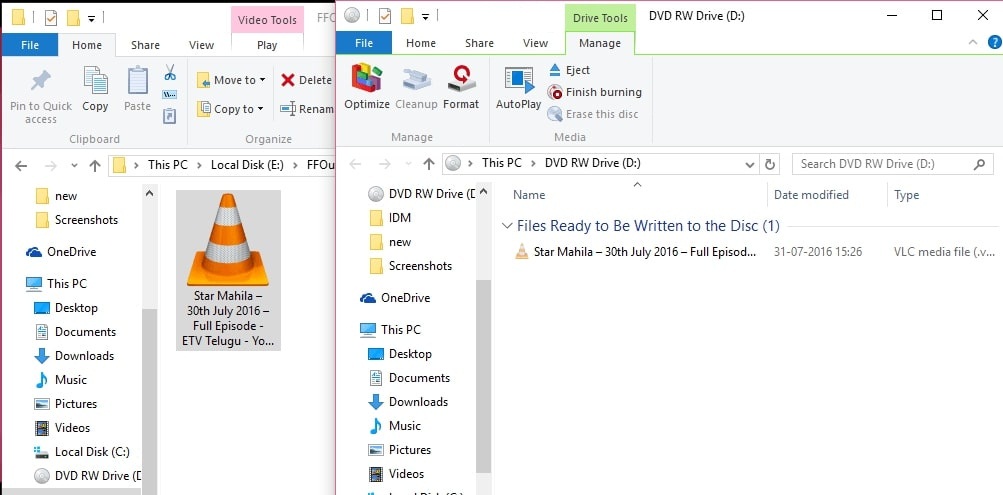
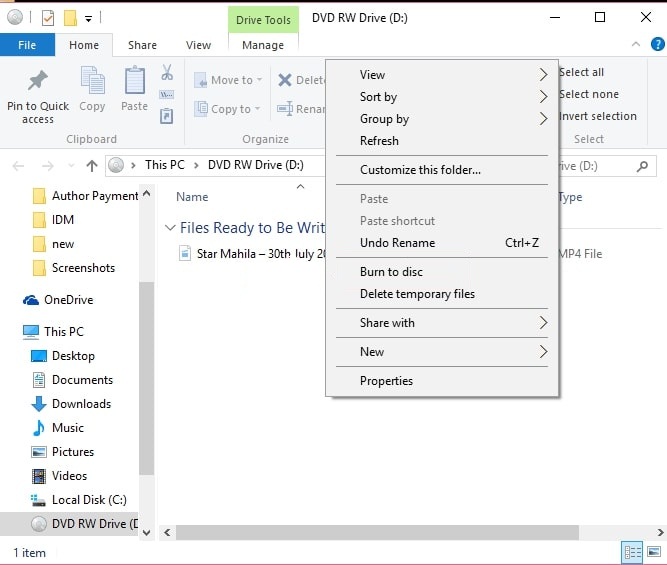
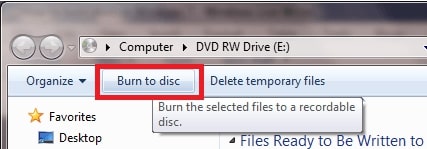
Step 5. Now as you have files that can be burned, click on the Drive tools option and then select Finish Burning option. You can also right-click in the window and you will see Burn to disc option in the menu.
Step 6. Another Burn to Disc window will open up where you want to change the Disc title and customize the recording speed then click on the Next button.
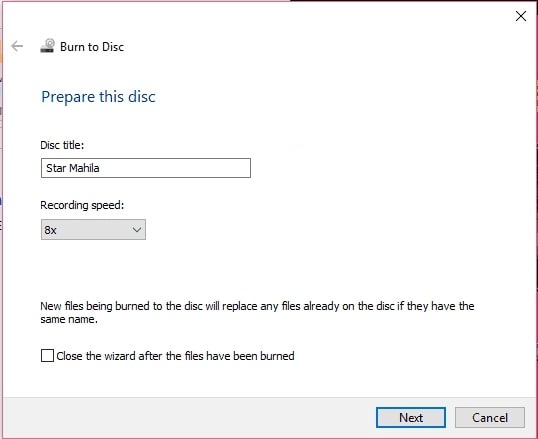
The burning process will initiate and you will be able to see the progress in the window. Once the burning is completed, your Windows 10 will automatically eject the DVD.
Part 3. Burn Data DVD in Windows 7 with Windows Explorer for Free
The Windows Explorer in Windows 7 is so powerful that it can burn the data disc without any difficulty. It can also be used to burn ISO images without the requirement of any third party software application. However, if you want to burn video DVD, then you will need an open source DVD Styler.
Now that you know that burning DVD isn’t that much of a big deal, you can easily do it with your Windows File Explorer. So, if you still have doubts that how can you burn the Data DVD in Windows 7 then here it the guide for you:
Step 1. Insert the blank DVD in your system’s drive and when the system shows a notification, select the Burn files to disc option.
Step 2. In the next screen, give a title to the disc and choose how you want to burn the disc.
Step 3. Now add files to the disc. You can use the drag and drop method or copy-paste method to copy the files to the DVD. You can also right click on the file and select the send to option to send the file to the drive.
Step 4. When you are finally done adding the files to the DVD, choose the Burn to Disc option below the file menu. Again, a window will appear where you can edit the disc title and recording speed.
Wait as the process completes, when the burning process completes, you will get a notification. You will also have an option to burn the same data to another disc if you want to.
Part 4. Burn Data Disc with Windows Media Center for Free
Along with File Explorer, there is another program in the Windows that allows the users to burn data disc without any other software. It is the Windows Media Center, which allows the user to burn the DVDs with its Media Center remote. This is a perfect choice if you want to you want to burn the protected WTV files to DVD.
So, if you want to know how to make data DVD in Windows 7 by using the Windows Media Center, then follow the steps below:
Step 1. Go to the Start menu and click on All Programs, there you will find the Windows Media Center.

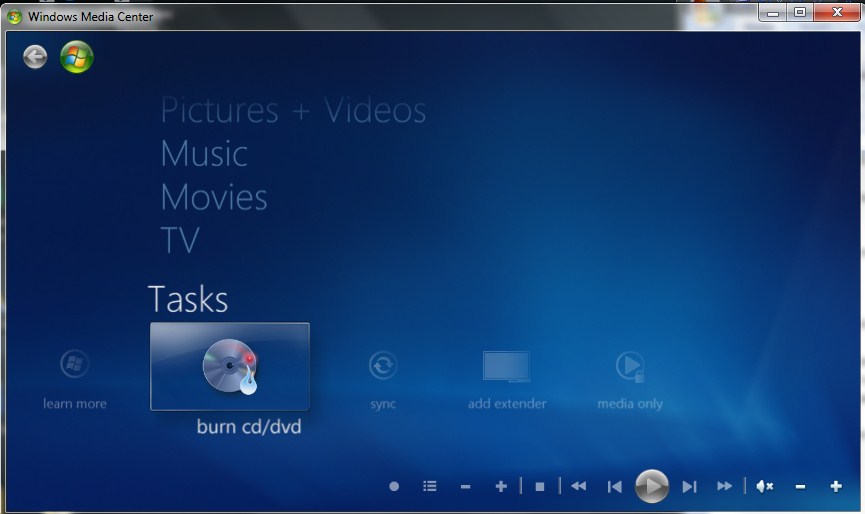
Step 2. When the Media center opens up to insert a blank DVD into the drive. The Media player will automatically ask whether you want to burn an audio DVD, or a Data DVD or a DVD slideshow. In case, the window does not appear on the screen, then scroll to the tasks and choose the Burn DVD option.
Note: If you want to create a DVD that you can play on the TV, then select the Video DVD or the Slideshow option.
Step 3. The Media Center will ask you to give a name to the DVD. It will ask you which files you want to burn. You can add the files by dragging them to the Media Center Screen.
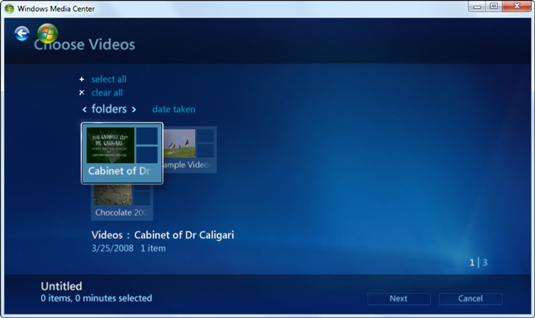
Step 4. Choose the option among Recorded TV, Videos, Music, and Pictures and then tap on the Next button.
Step 5. Select the Checkbox in front of the files that you want to burn and then click on Next. Keep repeating the process until you are done adding the files. Then tap on the Burn DVD option.
Step 6. The Media Center will ask one more time if you want to burn the clips, click “Yes” and wait.
The process will take a while to complete. As the process completes you will have a fully functional DVD that can be played on any DVD player.
Conclusion:
Now, you have learned enough ways by which you can burn data DVD in Windows 7/8/10. And if you want that all of the above functions must be performed simultaneously, then you can surely use the Wondershare DVD Creator. The software alone satisfies the need for multiple softwares for burning data.


Christine Smith
staff Editor
Comment(s)