How to Effectively Add Subtitles to Your DVD
I have purchased a DVD of a film in Chinese and unfortunately, it doesn’t have English subtitles in it. I have got it for my family and what can I do now? I have already got the DVD so is there any possibility to add subtitles to DVD now? Recently, I got to know that many online users have this query. So are you too facing the same tough situation?
Well, we have the simplest and easiest solution for it. Please see through this article and it will help you to add subtitles to DVD in 2 simple ways.
Part 1. How to Burn DVDs with Subtitles Using Wondershare DVD Creator
Most of the times, people purchase foreign movies without subtitles. To clear this problem, you can add subtitles to your own language and burn it to DVD with DVD creators available in the market. Wondershare DVD Creator is just one of the most popular and famous DVD creator software that burns videos/pictures to DVD or Bluray disc, adds subtitles to DVD, customizes DVD templates and menus, etc. In short, we strongly recommend you with Wondershare DVD Creator for qualified DVD burning.
Wondershare DVD Creator
- Burn videos and pictures in any format to DVD/Blu-ray/BDMV/ISO file.
- Add subtitles on videos easily and effectively, and crop, trim, rotate videos are also supported by the built-in video editor.
- Support any disc types starting from DVD-5, DVD-R, DVD+RW, DVD-RAM, BD-R, DVD+R to BDD-25.
- 100+ free static and dynamic DVD templates from Standard, Sport to Holiday theme.
- Customize DVD menu by changing background image or music, adding text, creating chapters and more.
- Edit video subtitle and burn it to DVD with super fast speed and high-quality output.
- More functions like photo slideshow, DVD copy, DVD to video conversion, ISO to DVD, Data Disc, and others are also available.
- Supported OS: Mac OS 10.14 (Mojave), 10.13 (High Sierra), 10.12, 10.11, 10.10, 10.9, 10.8, 10.7, 10.6, Windows 10/8/7/XP/Vista.
 Security Verified. 5,150,814 people have downloaded it.
Video Tutorial of How to Burn Videos to DVD with Subtitles on Windows
Steps on How to Add Subtitles to DVD with Wondershare DVD Creator
Below are the step-by-step implementation on how Wondershare DVD Creator adds subtitles to your DVD.
Step 1 Choose DVD Disc Type
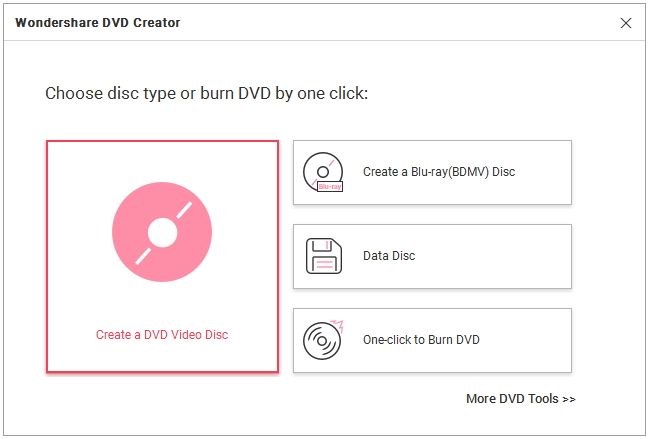
Launch Wondershare DVD Creator and select Create a DVD Video Disc from the pop-up window.
Step 2 Add Source Videos
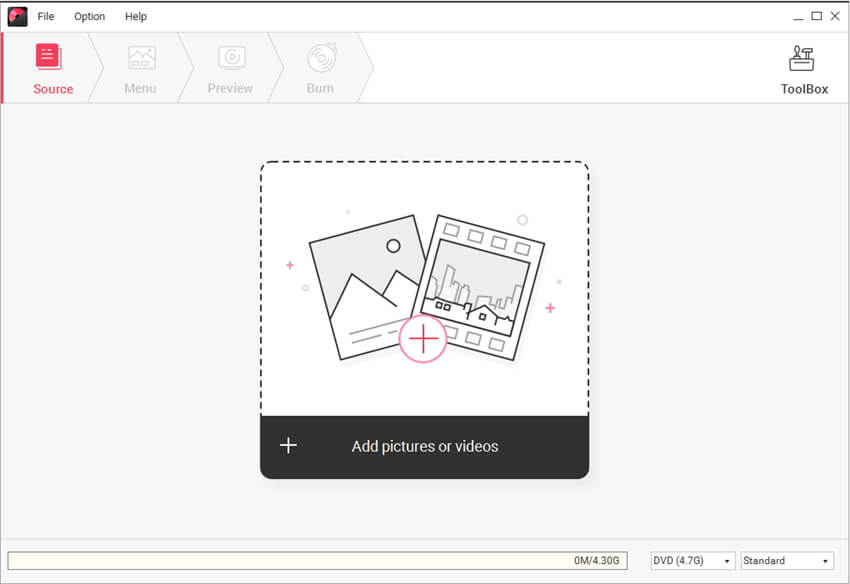
Click the + button under the Source tab to import the video file or part of movie from DVD folder that you want to add subtitles to. Simply drag and drop files to the interface is also supported.
Step 3 Add Subtitles to DVD
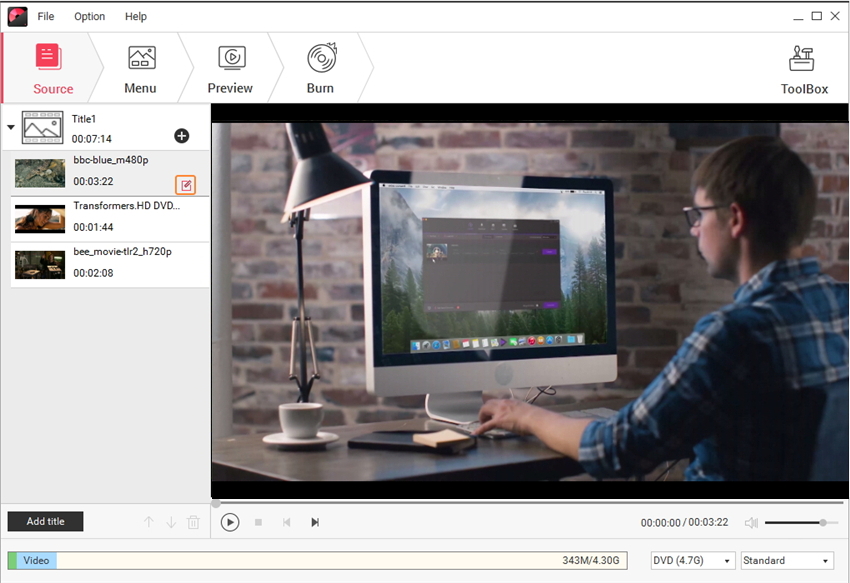
Once your target video is loaded to the program, click the pencil-like icon on the thumbnail to get the Video Editor window.
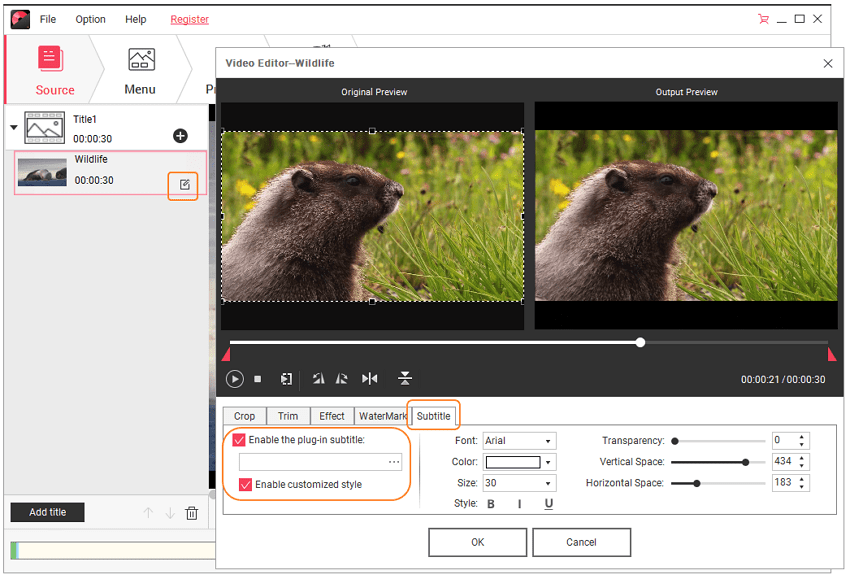
Click the Subtitle tab as the screenshot shows, check the box before Enable the plug-in subtitle: and browse the subtitle file from the local PC. You can also edit subtitles by changing subtitle font/color/size/style and adjusting transparency/vertical space/horizontal space via the built-in editor, after that, click OK to proceed.

Step 4 Customize DVD Templates & Menus
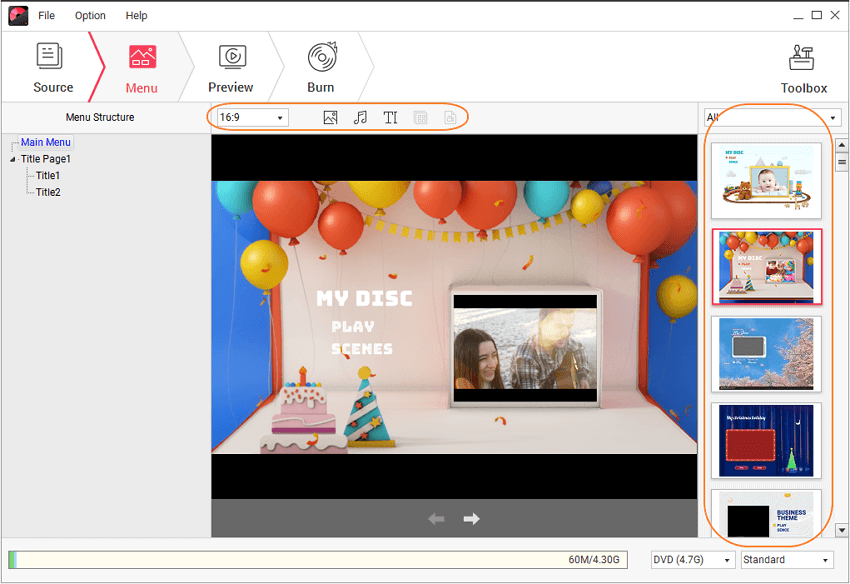
Switch to Menu option, you'll get a list of attractive templates in the right-side window. Select one you favor and double-click to apply. Click the icons present on the top of the interface to customize the menu as you wish, including chapter frame, text, thumbnail, background music and more.
Step 5 Preview & Burn DVD with Subtitles
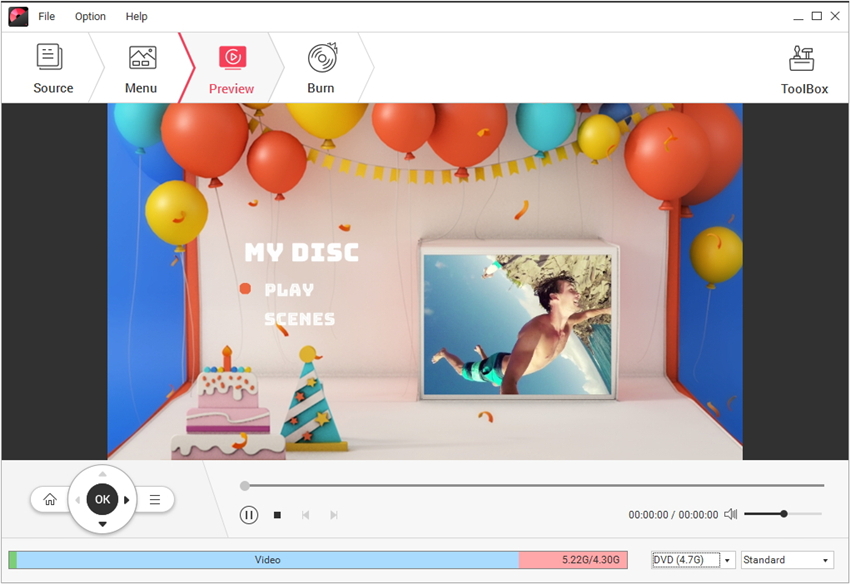
Now go to the Preview option to view your DVD creation. Note that you can always return to the previous step to make changes if required.
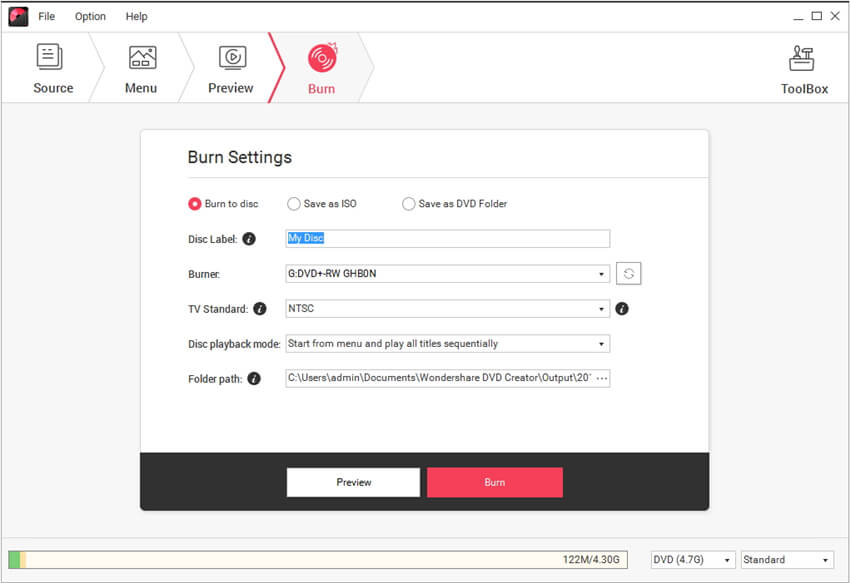
When everything is set, switch to the Burn option in the top. Choose Burn to disc option and complete the output settings for your DVD. Finally, press Burn to start burning subtitles into DVD.
Part 2. How to Free Add Subtitles to DVD with Subtitle Edit
Apart from Wondershare DVD Creator to add subtitles to DVD, there're various freeware online allowing you to burn subtitles into DVD. The most commonly-used tools include Subtitle Edit, DVDshrink, subtitle creator, Ifoedit, PgcDemux and VobBlanker. Here we go with Subtitle Edit, one of the free open source application that edits video for subtitles, burn or transfer video to other sources like DVD, CD, SAMI and other 200+ formats. Now let's skim through how to add/burn subtitles to DVD via the steps below.
Step 1: Download the Subtitle Edit software of 3.0 version.
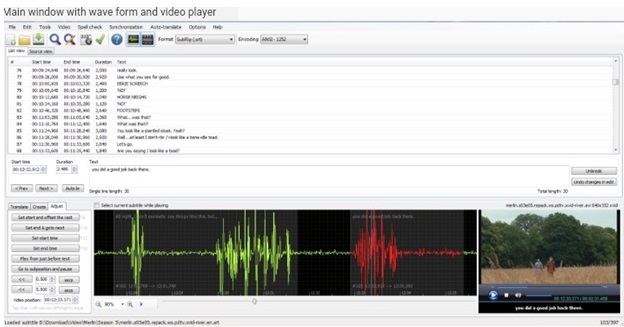
Step 2: Now, you will be directed to the main window where you can add the subtitle files from the folder which has to be added to movie parts.
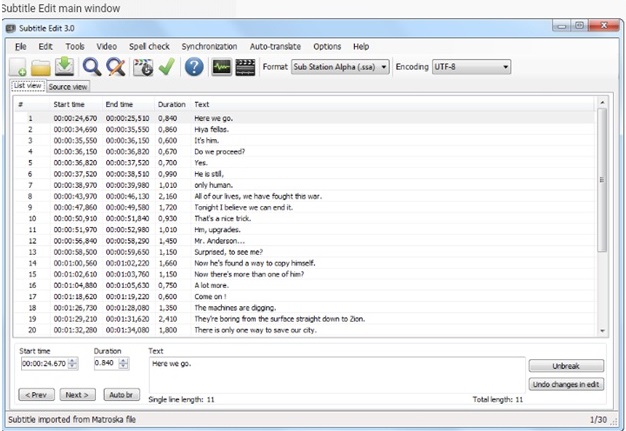
Step 3: In this step, you can play the subtitle file along with the help of video player for better clarification.
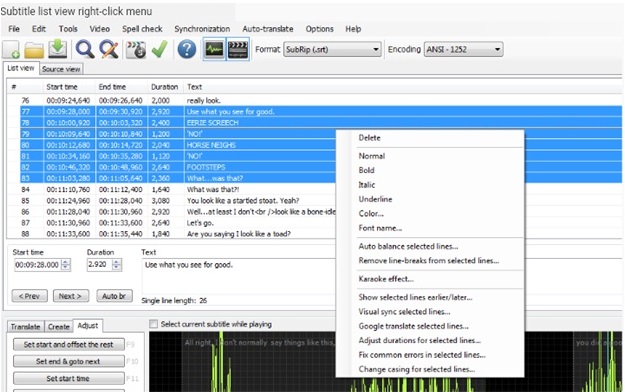
Step 4: This step allows you to format the subtitle style by changing the font and color of subtitles if needed.
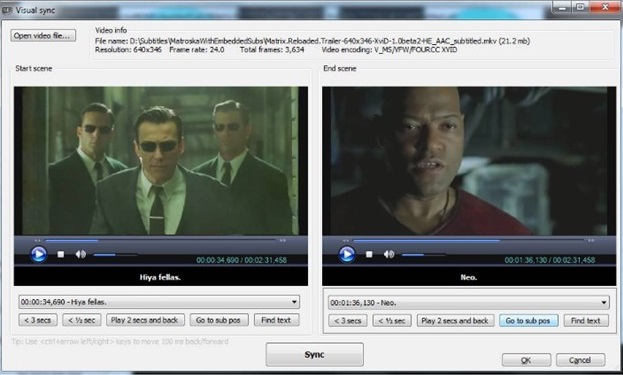
Step 5: In visual sync window, you can match the subtitles to correct scene of the movie and as per sequence match all the subtitles to the scene. And now you had added subtitles to your DVD. Your subtitles are now ready to be burnt into DVD and ready for your entertainment.
Part 3. Wondershare DVD Creator vs. Subtitle Edit
| Features | Wondershare DVD Creator | Subtitle Edit |
| Quality of Output Good resolution effects, free from flaws, fast rate conversion and high-quality output |
 |
 |
| Better editing and customizing options Allows you to Trim, enhance, crop, add subtitles, bookmarks, watermarks, DVD templates and menus |
 |
 |
| Ease of Use Interface facilities along with guide and support for 24/7, online helping guide for easy access |
 |
|
| Security Safe protection and authentication process along with password protection to ensure that information is safe and secure |
 |
After deeply studying the features and comparing Wondershare DVD Creator with some other freeware applications to add Subtitles to DVD, now we're clear how to add subtitles to your DVD effectively. Absolutely, Wondershare DVD Creator proves to be the best software for all your DVD operations. Additionally, for the immense and unbeatable DVD editing and enhancing features of Wondershare DVD Creator, we strongly recommend you to use it for all your DVD creations for better performance and improved quality.


Christine Smith
staff Editor
Comment(s)