

How to Burn Aperture/iPhoto/PPT Slideshow to DVD on Windows/Mac
How can I burn a slideshow to DVD? This question has been brought up so many times, how should I burn Aperture slideshow, iPhoto slideshow, or PPT slideshow to a DVD? Many people want to transfer their slideshows created on other devices to DVD or Blu-ray disc so that they can get a better watching experience. After slideshow to DVD creation, you can distribute it more easily or better preserve them from scratch. However, the DVD creating programs you adopt can hardly meet your needs. What you care is that the created DVDs should be readable, no audio sync problem, and playable on any standard DVD players. Surely, fast burning speed is a plus.
If this is your case, you'll find your solutions here. This article will introduce how to burn slideshow to DVD free with Windows DVD Maker on Windows 7, and the best way to convert slideshow to DVD on Windows 10/8/7 or Mac.
Part 1. How to Burn Presentation Slideshow to DVD Free on Windows 7
Windows DVD Maker is a free software developed by Microsoft for Windows 7 users. It can burn videos and photos to DVD easily on Windows 7. Many Windows users like it very much as it is free and users do not need to download any 3-rd party software to their PC. Here we'll tell you how to burn slideshow to DVD free with Windows DVD Maker simply on Windows 7 step by step.
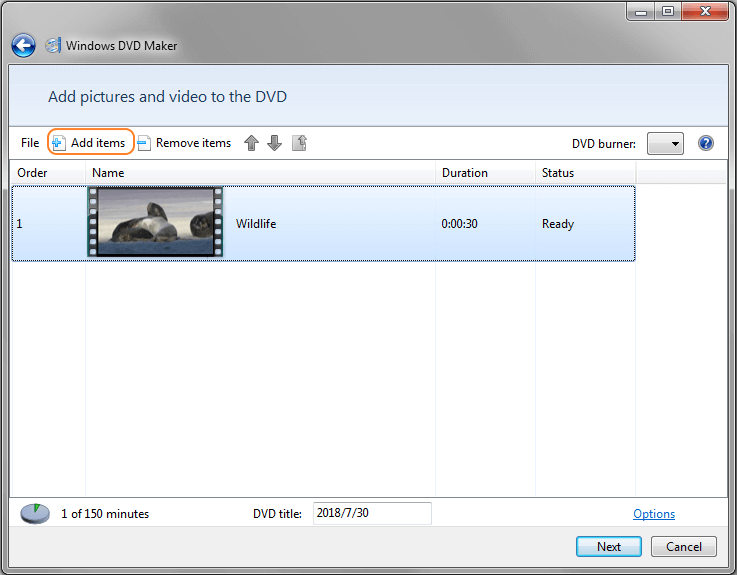
Step 1: Open Windows DVD Maker program on your Windows 7 system, and click Add items button on the left-top corner to import slideshow videos.
Step 2: Choose your desired videos and once it added, you can see the thumbnail on the interface. You can still add or remove slideshows here as you like. Then click Next button to go on.
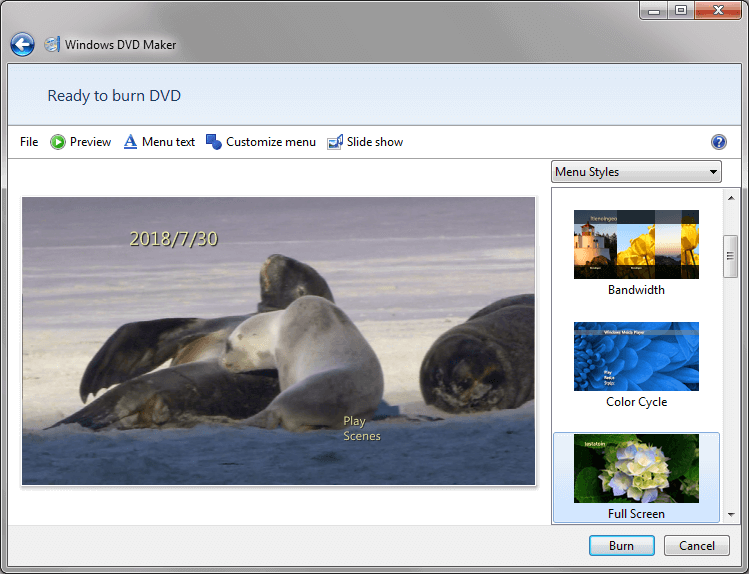
Step 3: Here you're allowed to preview your videos and make some customization. Click the icons shown on the interface.
Step 4: After all changes have been completed, click the Burn button to burn slideshow videos to DVD.
Your slideshow will be burned into DVD after the burning process completed, and you can watch your slideshow videos on TV for free now. But there is a question that Windows DVD Maker doesn't support Windows 8 and Windows 10, for those who use Windows 8/10 and Mac, they need to download a third-party tool to help burning slideshow to DVD.
Part 2. Best Way to Burn Slideshow to DVD on Windows/Mac
Wondershare DVD Creator is an all-in-one software which can help you burn slideshow to DVD on Windows 10/8/7 and Mac OS 10.6 or later. It supports any format videos such as MP4/AVI/MOV/MKV and more others. You can also burn photos to create a slideshow to DVD directly with kinds of features. Wondershare DVD Creator has toolbox which includes additional functions such as Video Editor, Slideshow Maker, DVD to DVD, DVD to Video, and others. It's a professional and feature rich DVD creator software. With it, you can easily burn DVD from your slideshow files and then play it smoothly on portable or home DVD player. In addition, you're able to set NTSC or PAL video standard, 4:3 or 16:9 video aspects, as well as add a menu for easier navigation.
Wondershare DVD Creator
- Burn slideshow to DVD with super fast speed and no quality loss on Windows/Mac.
- Edit Aperture/iPhoto/PPT slideshow videos with features of trimming, cropping, watermarks, subtitle, etc.
- Create photo slideshow to DVD directly with background music, picture effects, subtitle, and more features.
- Burn slideshow to DVD with 100+ free menu template designs from Travel to Family Life menu.
- Customize slideshow to DVD menu with pictures, music, text, and others.
- Additional functions such as ISO to DVD, Data Disc, Video Editor, DVD to DVD Copy, DVD to Video Converter, One-click to Burn, etc.
- · Supported OS: macOS 10.14 (Mojave), 10.13 (High Sierra), 10.12, 10.11, 10.10, 10.9, 10.8, 10.7, 10.6, Windows 10/8/7/XP/Vista.
 Security Verified. 5,150,814 people have downloaded it.
Video Tutorial to Learn How to Burn Slideshow Video to DVD on Windows 10/8/7
Step-by-step guide to burn slideshow video to DVD with the Wondershare DVD Creator:
Step 1 Choose to Create a DVD
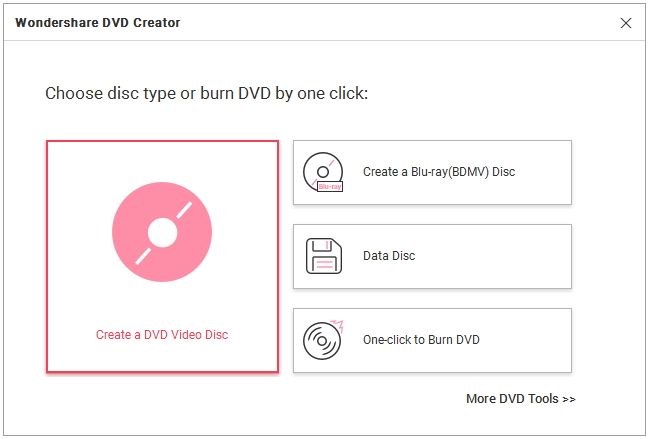
Firstly, you should download and install Wondershare DVD Creator on your PC/Mac, then open it and choose Create a DVD Video Disc from the interface.
Step 2 Import Slideshow Videos to DVD
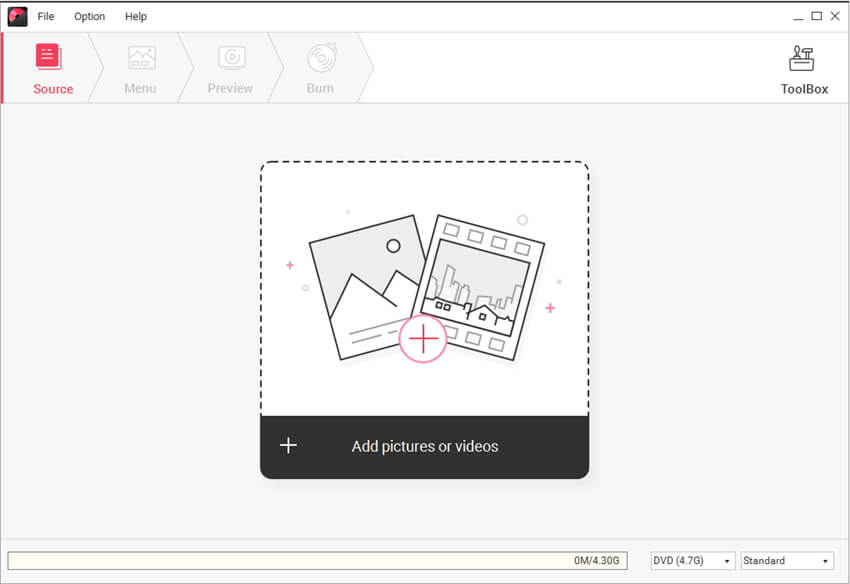
You'll come to the interface under Source tab and you can import slideshow videos here by click the + icon on the interface. You can also directly drag and drop slideshow videos to the program.
Step 3 Edit Slideshow Video with Wondershare Slideshow Burner (Optional)
All added slideshow videos will be displayed as thumbnails on the left panel, you can add several slideshow videos at a time. For video editing, you can click the pencil-like icon on the thumbnail to crop, trim, add watermarks, apply effects, and others on the new window. You can skip this steps if you don't want to change your videos.

Step 4 Customize Slideshow to DVD Menu
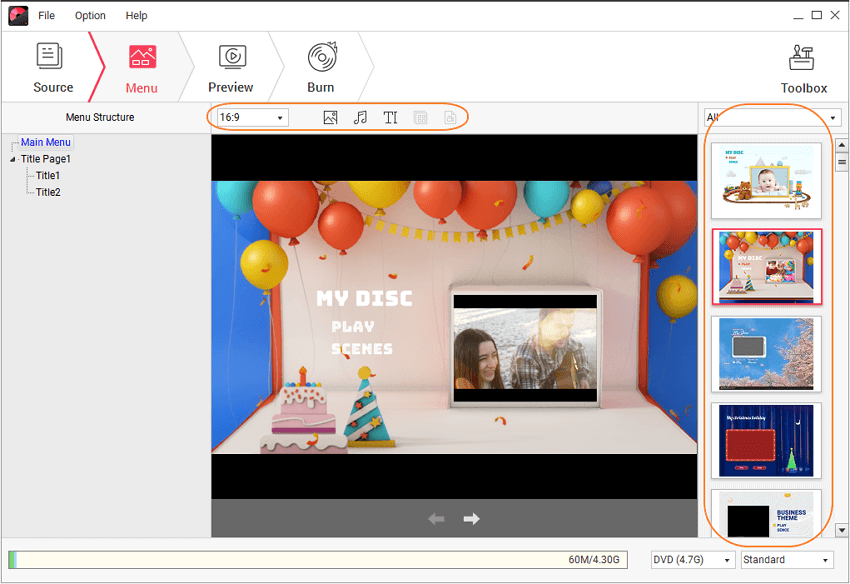
You can customize your slideshow to DVD menu under the Menu tab. 100+ free menu template designs with different themes will be shown on the right panel. Choose one template you like and make further customization by clicking the icons upon the active window, you're allowed to change background music/picture, edit text, create chapters, etc.
Step 5 Burn Slideshow to DVD
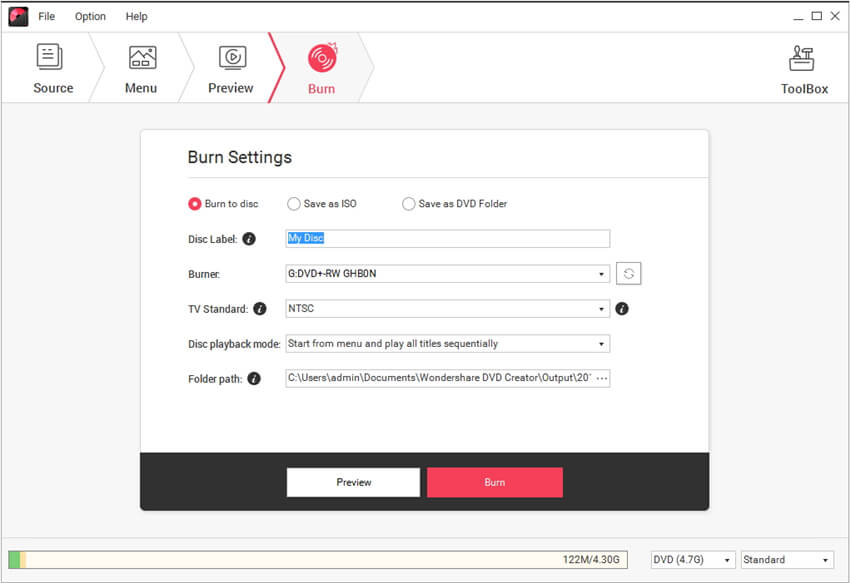
Move to Preview tab to check all your creations, changes can be made by going back to the Source or Menu tab. Next, move to Burn tab and choose Burn to disc option, finish all Burning Settings and click Burn button to convert slideshow videos to DVD within a few minutes.
This step-by-step guide shows you how to burn slideshow videos to DVD on Windows 10/8/7. If you are a Mac user, just follow the steps as they are very similar on operation.
Part 3. Bonus Tip: How to Turn Slideshow to Video
You know, when burning slideshow to DVD, you have to turn your slideshow files to video first. Don't know how to create video from them? Below lists some workable ways you can resort to:
PPT slideshow: Use the free service AuthorStream to share your PPT on the web first. After that, you'll see links to download the file as a MP4 video, click that link and get it ready to burn it to DVD. Alternatively, you can use paid software like Camtasia to capture PowerPoint slides directly and save the video for burning.
iPhoto slideshow: When you finish the photo slideshow making, please click File > Export > Slideshow and then choose QuickTime Movie as the output format. In this way, you'll get an MOV file ready for burning.
As for Aperture slideshow, please learn more from this article: How to Create an Aperture Slideshow and Burn to DVD.
Now, you can easily turn your PPT slideshow, iPhoto slideshow, or Aperture slideshow to videos, and burn into DVD/Blu-ray disc easily with Wondershare DVD Creator on Windows and Mac.


Christine Smith
staff Editor
Comment(s)