

How to Burn Windows Movie Maker Files to DVD?

Want to burn your Windows Movie Maker project files to DVDs, so you can play them on your DVD player?
There are a lot of people who regularly searches for a way to burn the Windows Movie Maker files to a DVD. But they usually don't find an appropriate method to do it. A Windows Movie Maker project file is not a video file. And almost all DVD burning tools cannot allow you to directly import Windows Movie Maker project files to burn DVDs. You need to save them as WMV video files, then you can use your favorite DVD burner to burn to DVDs. If you are looking for a way to burn Windows Movie Maker files to Windows 7/8/10, here is the guide which would allow you to burn Windows Movie Maker files to DVD easily. We are providing you the best and free way to burn WMV files to DVD with Windows DVD Maker on Windows 7, and the alternative software as the Windows Movie Maker to DVD converter that would help you to burn the files on Windows 8 and above.
Part 1. What is Windows Movie Maker
Windows Movie Maker is the software designed by Microsoft for video editing. This software is a part of Windows Essentials software suite and provides the ability to edit and create videos. It can also be used to publish those videos on various platforms such as OneDrive, Facebook, YouTube, Flickr, and Vimeo. The input formats for the Windows Movie Maker include .wmv, .asf, mpg, .avi, .wma, .wav, etc. But the earlier versions of the Windows Movie Maker only supported the Windows Media Video or the DV AVI formats. The output format the movie maker supported for different media files such as Project File- WLMP, Snapshot- PNG, Playback- MP4, and DVD- WMV. The entire format list was supported by the new edition of the Windows Movie Maker. But, it is no more available for the users. If any website offers you to download the software, then don't trust that because it will be fake software.
Part 2. How to Burn Windows Movie Maker Files with Windows DVD Maker on Windows 7
Windows DVD Maker is the DVD authoring utility that allows the users to create DVD videos and slideshows for media playback. It had a very simple procedure to convert Windows Movie Maker files to DVD. This application had an interactive feature of video preview that allows the users to have a look at the DVD and provides the same feel when it will be burned. On Windows 7, the Windows DVD Maker is the default burning software for the videos and it is preinstalled in the OS, but it was discontinued after Windows 7, so you can't find it on your Windows 8/10 system.
Steps to burn Windows Movie Maker files to DVD on Windows 7 is given below:
Step 1: At first, open the file or project that you wish to burn to DVD in the Windows DVD Maker. Launch the Windows Movie Maker and click on Add items button to add your WMV files present on your computer.
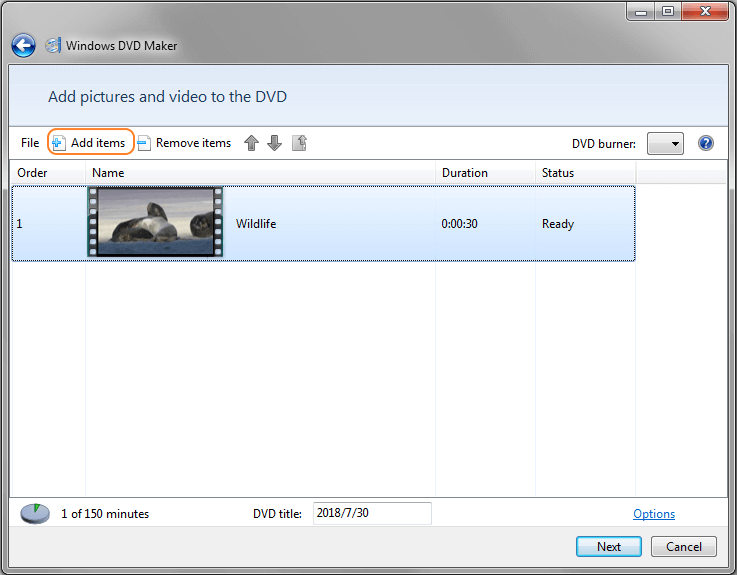
Step 2: You can add multiple Windows Movie Maker files as you like. Then click the Next button on the right-bottom to go to the next step.
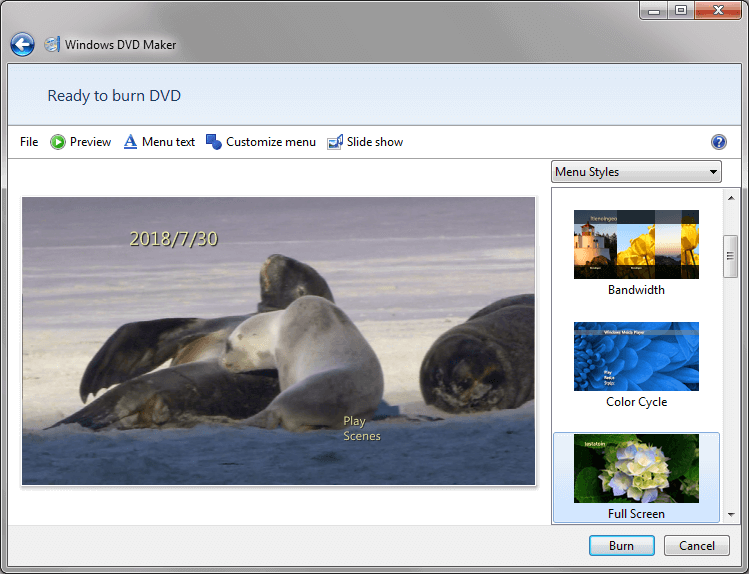
Step 3: Now, you will come to the Ready to Burn DVD interface, and choose a DVD menu style for your Windows Movie Maker files from the right panel.
Step 4: You're allowed to customize your DVD menu by clicking the buttons on the top bar. Or preview the DVD and click the Burn button to burn your WMV video files to DVD on Windows 7.
Part 3. Best 2 Ways to Burn Windows Movie Maker Videos to DVD on Windows 10/8/7
As the free Windows DVD Maker can't work on Windows 8 and Windows 10, so you need their alternative to burn Windows Movie Maker files (WMV) videos to DVD. There are two methods to help you burn the Windows Movie Maker files to DVD easily and quickly on Windows 10/8/7. If you are a Mac user, you can also download this 2 software and follow the similar steps listed below.
Method 1: Burn Windows Movie Maker Videos to DVD with Wondershare DVD Creator
Wondershare DVD Creator is an easy and powerful toolbox which is specially designed by Wondershare to meet your DVD needs. The method of burning the files into a playable DVD format is an excellent option to preserve the file and have a separate backup of the file. Wondershare DVD Creator can help you to do the same without going through a complex process, and it also provides many customized features if you want to create your DVD more attractive. It also has many additional tools related to DVD, so you can enjoy the abundant functions in only one program.
Wondershare DVD Creator
- · Burn Window Movie Maker files to DVD on Windows 10/8/7 with super fast burning speed and high-quality output.
- · Supported most popular video formats including WMV/MP4/MOV/AVI/MKV and others.
- · Edit Window Movie Maker videos with Crop, Trim, Rotate, Subtitle, Watermark, Effect, and others.
- · Choose DVD menu from 100+ free templates design with Nature, Travel, Family Life themes.
- · Customize DVD menu templates with background picture, background music, text, chapters, etc.
- · Additional toolbox with functions of Data Disc, ISO to DVD, Video Editor, Slideshow Maker, DVD to Video, One-click Burn DVD/Blu-ray Disc, etc.
- · Supported OS: macOS 10.14 (Mojave), 10.13 (High Sierra), 10.12, 10.11, 10.10, 10.9, 10.8, 10.7, 10.6, Windows 10/8/7/XP/Vista.
Video Tutorial on How to Burn Windows Movie Maker Files to DVD on Window 10/8/7
Steps to burn Windows Movie Maker Videos to DVD with Wondershare DVD Creator:
Step 1 Launch Wondershare DVD Creator
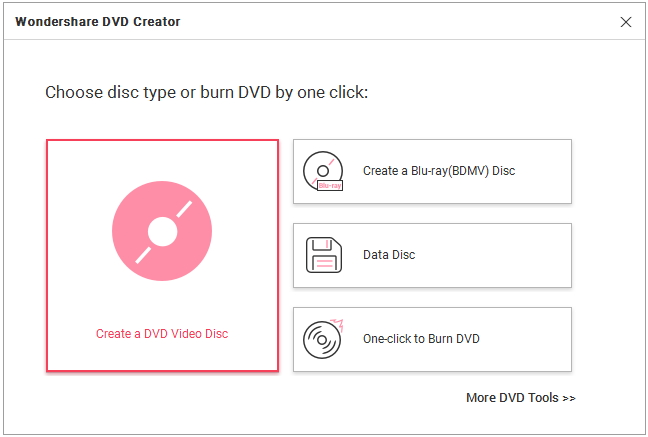
Download, install and launch Wondershare DVD Creator on your PC/Mac, and select the disc type from the homepage as Create a DVD Video Disc.
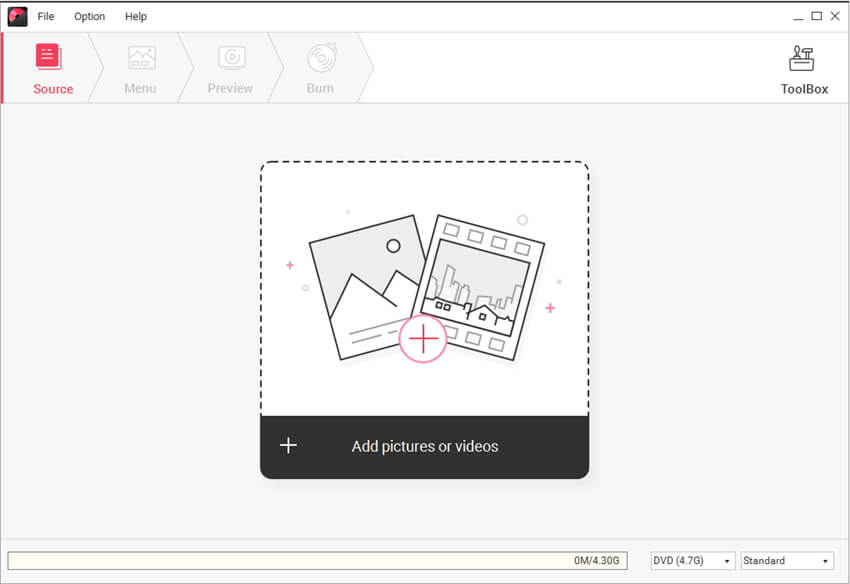
Step 2 Add and Edit Windows Movie Maker files
In the next step, import the Windows Movie Maker videos by clicking on the " + " icon in the middle of the screen. You can also use the drag-and-drop method to add the video file you want to burn to the DVD.
All added files will be displayed with their thumbnails along with its name and length. Move the mouse across the video thumbnail and you will be able to see the pencil-like icon, click it to open the Video Editor window. You can now trim, crop, enhance, add effect, subtitle, and watermark to your video.

Step 3 Customize Windows Movie files to DVD menu
Go to the Menu tab, and you can select from more than 100 DVD templates and double-click on the one you really like to apply it to the video. If you want to make further customization, click the icons upon the active window, then you're allowed to change background music, picture, text, thumbnail, and creating chapters.

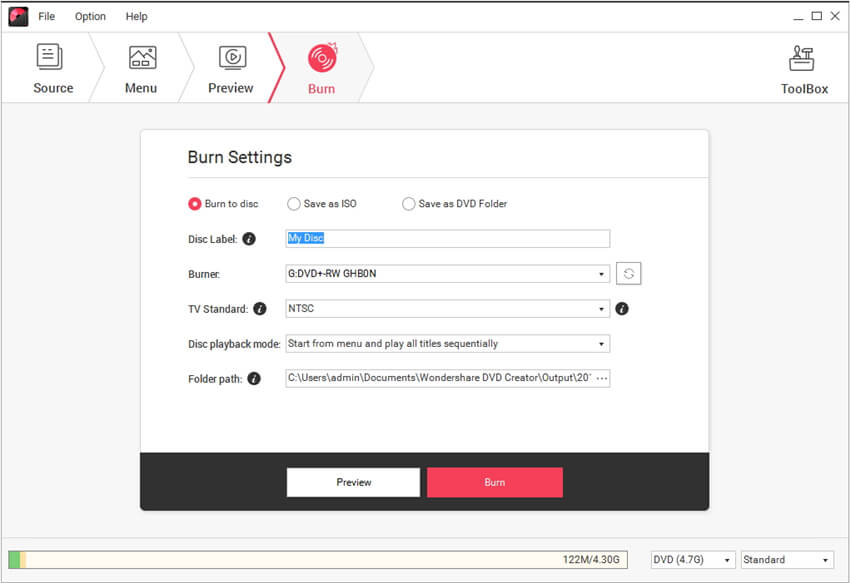
Step 4 Burn Windows Movie Maker files to DVD
Now, go to the Preview tab to check the video DVD you created. You can also go back to the Menu/Source tab if you want to make some additional changes. Finally, if you are completely satisfied with the video you created, move to the Burn tab and choose Burn to disc option. Finish all Burning Settings on the interface and click Burn button to start burning Windows Movie Maker files to DVD.
With the help of the Wondershare DVD Creator, you can even burn the Windows Movie Maker files to DVD on Windows 10/8/7.
Method 2: Burn Windows Movie Maker Videos to DVD with Wondershare Video Converter Ultimate
One another method to burn the Windows Movie Maker files to DVD on Windows 8 and above is by using Wondershare Video Converter Ultimate. It is an ultimate toolkit to convert, download, edit, and burn videos in 1,000+ formats. The fast conversion and the high-quality output make the software a perfect choice to burn videos in various different formats.
Step by step guide to burn Windows Movie Maker videos to DVD with Wondershare Video Converter Ultimate:
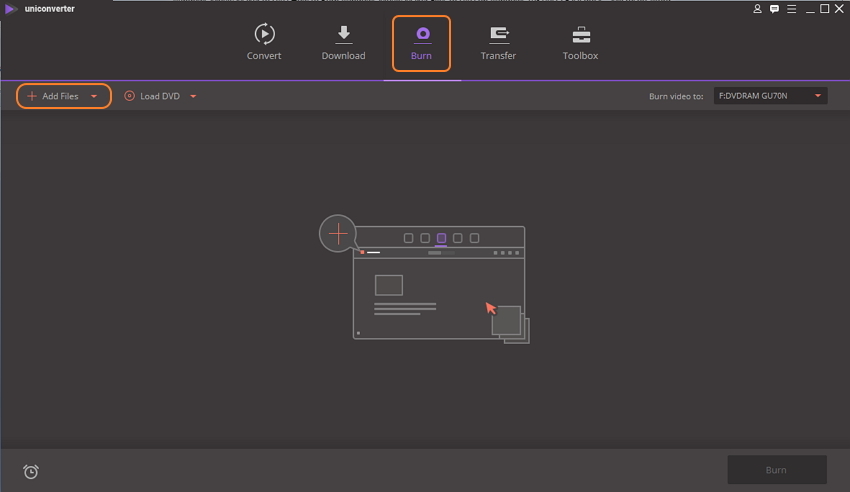
Step 1: Launch the software on your PC and select Burn tab when the main screen opens up. Then click on the +Add Files icon to add the Windows Movie Maker files that you want to burn to DVD. The files you will select will be present in WMV format as it is the default and only format supported by the Movie Maker.
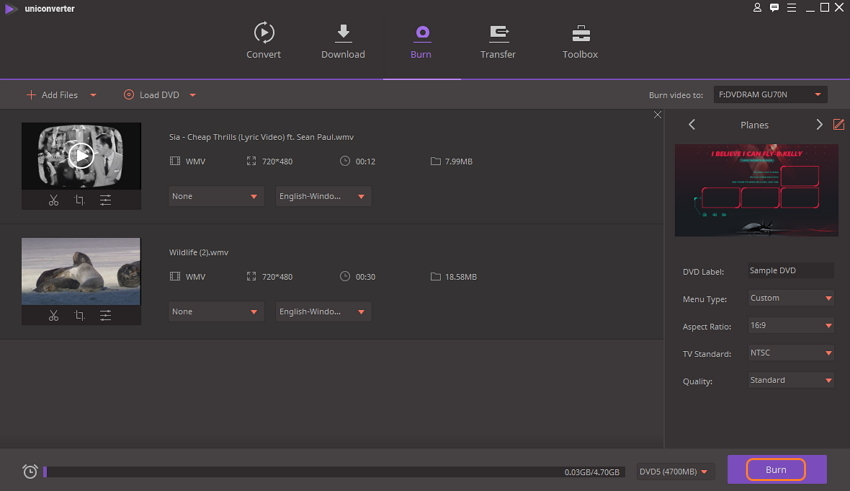
Step 2: In the next step, go to the right side panel and choose the desired template for your DVD. You can also customize the videos by click the icons on the thumbnail if you like.
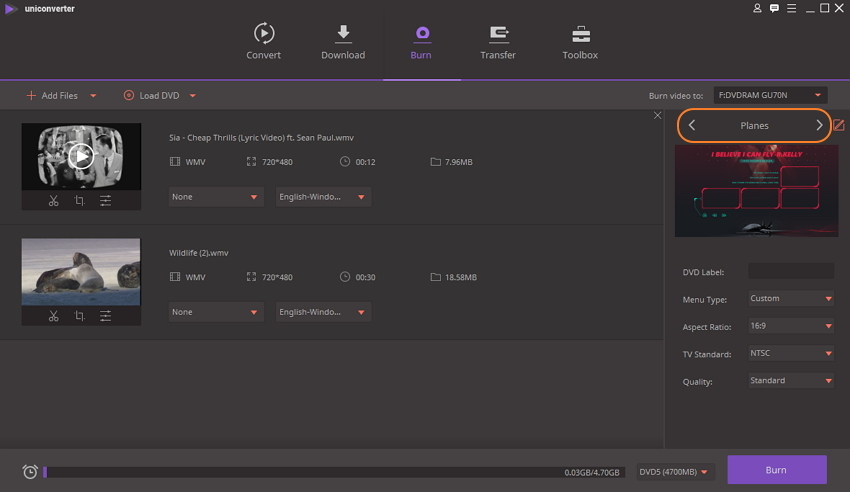
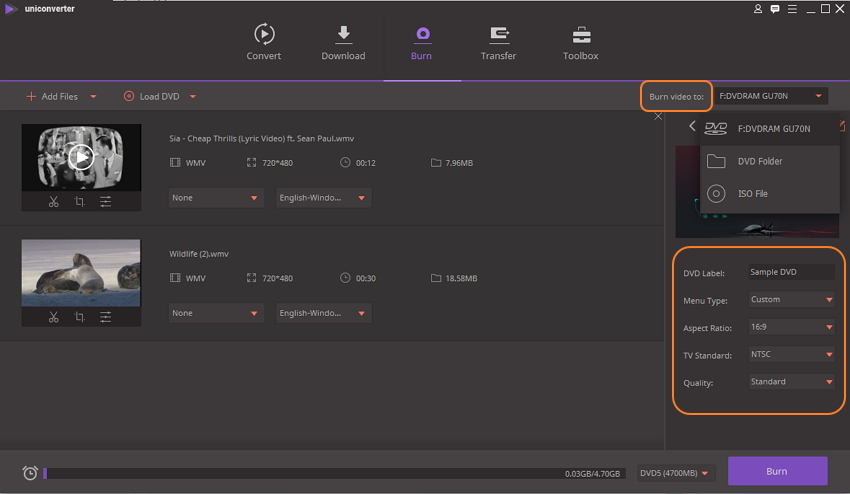
Step 3: Then select the destination folder to burn the video by tapping on the option which says Burn video to. Select the DVD label and you can also make a change to other parameters like Menu type, Aspect ratio, quality, and TV standard.
Step 4: Finally, tap on the Burn button to initiate the process of burning videos to DVD. Your Windows Movie Maker videos will be burned to DVD successfully after a few minutes.
Conclusion: So, now you know 3 methods about how to convert Windows Movie Maker files to DVD on Windows 7, 8 and 10. Choose the best way you like, and you don't need to worry about losing your old files again as they will be safe and preserved on the DVD.


Christine Smith
staff Editor
Comment(s)