How to Convert Xvid to DVD Effortlessly
Xvid is a compression technology through which large size videos can be compressed into small size files without compromising on the quality. Since Xvid uses the latest MPEG-4 ASP technology, there are only a limited number of players and devices that support playing these videos. Thus, one simple solution to play your Xvid videos on any standard DVD players is to convert Xvid to DVD. Moreover, you also get a physical backup of your Xvid videos which you can use in case of any accidental damage or loss of original files. Read the following part of the article to know more about how to burn Xvid to DVD.
Part 1. Do You Have An Xvid DVD Player
There are only a limited number of DVD and Blu-ray players that are compatible playing Xvid videos like Sony DVP-SR170 Compact DVD Player. Some DivX DVD players also claim to support Xvid files, but the majority of them do not play the files as they are not compatible with latest MPEG-4 features like multiple B-frames and MPEG quantization. Thus, with limited availability of Xvid DVD player and compatibility issues with the rest, the best way is to convert Xvid to DVD and play them on any DVD player without any issues. There are a number of free as well as paid software that you can use to convert your Xvid files to DVD. Once burned, you also have a physical backup of your Xvid videos on a disc.
Part 2. How to Convert Xvid to DVD in Clicks
There are different types of Xvid to DVD converters available. If you want to get your files converted in just a few clicks without compromising on quality, professional burning software is needed. Wondershare DVD Creator is one such program that offers excellent quality in no time. The built-in video editor of the software helps in editing your videos by trimming, cropping, and cutting. You can also apply special effects and add watermarks. There are different menu templates available to make your DVD look interesting.
Key features to convert Xvid to DVD
Wondershare DVD Creator
- . Supports burning Xvid and major video formats like MTS, M2TS, WMV, MP4, WMV to DVD/Blu-ray Disc/Data Disc/ISO File.
- · Edit Xvid videos with copping, trimming, rotating, adding watermarks, editing subtitle, and others before burning to disc.
- · Customize DVD menu with different parameters like title, music, background picture, text, etc.
- · Offer 100+ free static and dynamic menu templates with different themes of Travel, Movie, Memory, and others.
- · Burn Xvid videos to DVD directly with super fast burning speed and high-quality output.
- · Additional toolbox with functions of Data Disc, ISO to DVD, Slideshow Maker, Video Editor, DVD to DVD, etc.
- · Supported OS: Windows 10/8/7/XP/Vista, Mac OS 10.14 (Mojave), 10.13 (High Sierra), 10.12, 10.11, 10.10, 10.9, 10.8, 10.7, 10.6.
Watch Video Tutorial to Learn How to Burn Xvid Videos to DVD
Steps on how to convert Xvid to DVD using Wondershare DVD Creator:
Wondershare Xvid to DVD free software download is available at Wondershare DVD Creator website.
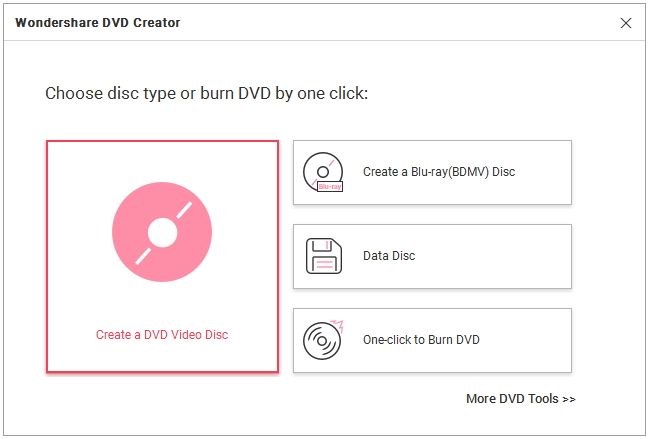
Step 1 Open Wondershare Xvid to DVD Converter and start DVD creation option.
Download, install and open Wondershare Video Converter on your PC. Once the software interface opens, choose the option Create a Video DVD Disc.
Step 2 Load Xvid files to DVD Creator.
On the Source tab of the software interface, hit + icon to add the Xvid videos present on your computer. Search for the desired files and click OK to add. Multiple videos can be added here. You can also drag and drop the files to the software interface.
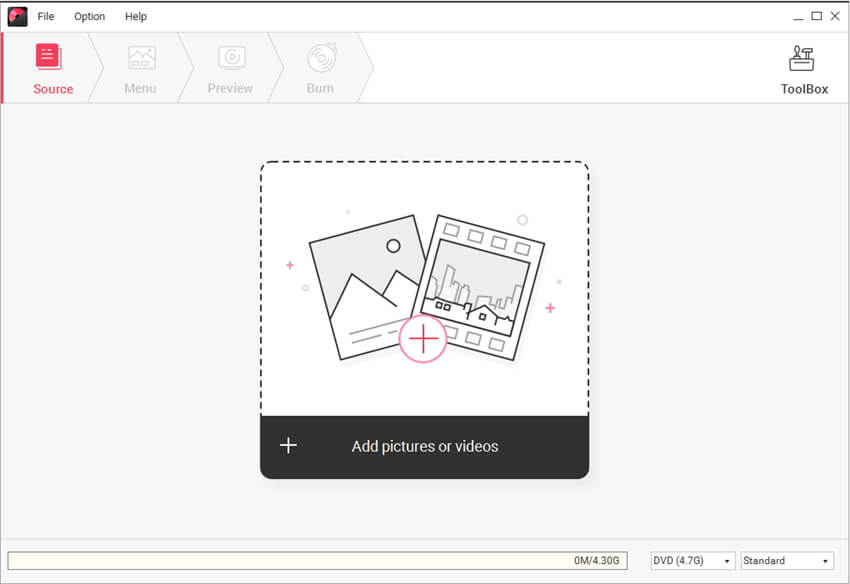
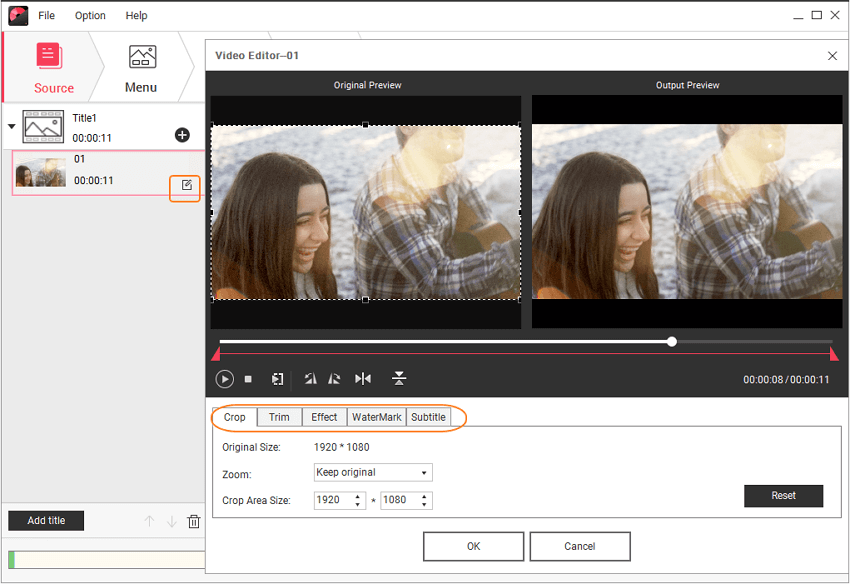
The left side of the screen will show the added videos as thumbnails. The pencil icon at the thumbnail can be used to edit the videos with the functions of cropping, trimming, adding watermarks, and more before burning to DVD if needed.
Step 3 Customize DVD menu template.
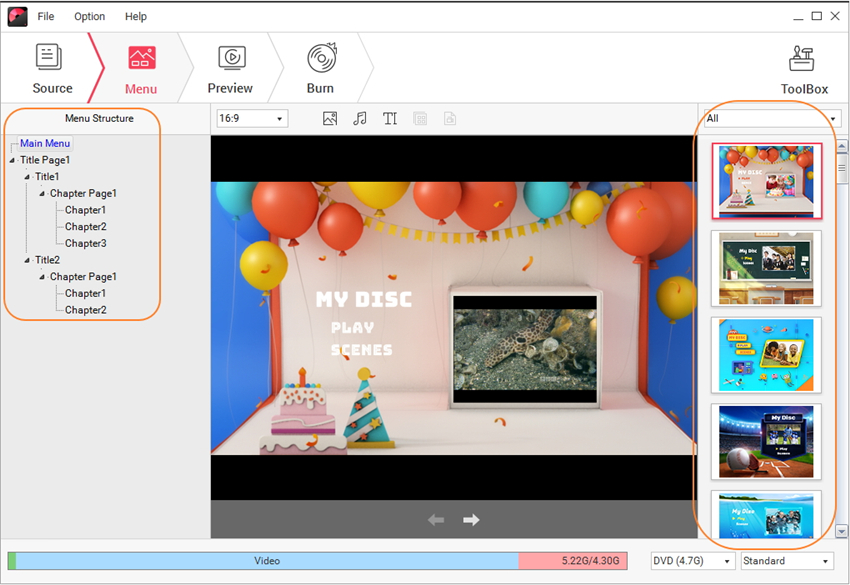
Move to the Menu tab of the software. The available designs of the template will be shown on the right side of the screen. You can choose from the given designs or can also download more by hitting the download icon.
Double click to apply a template for your DVD creation and click the desired icon at the top of the screen to customize the templates by music, picture, text, etc.
Step 4 Preview the created disc before Xvid to DVD conversion(optional).
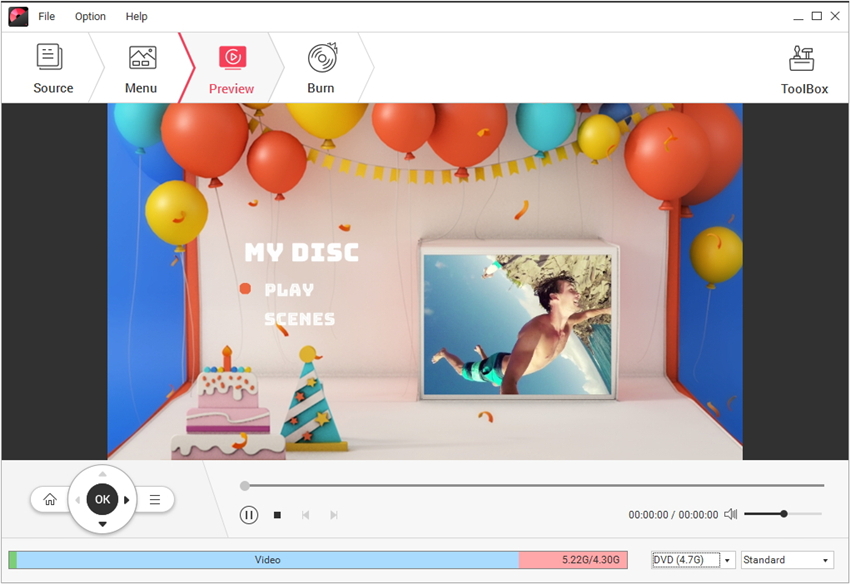
To preview the DVD disc that you have created, move to the Preview tab of the software interface. Go back to Source tab or Menu tab to make changes if you're not satisified with your DVD.
Step 5 Convert Xvid to DVD.
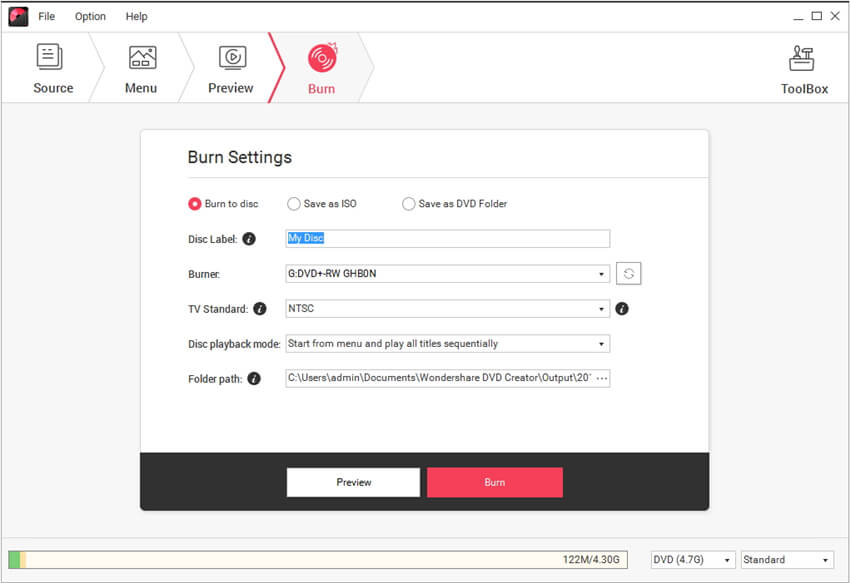
Next, move to the Burn tab. A settings window will pop-up from where choose the option of Burn to disc. Enter the desired Disc Label, and select other disc parameters. Please remember to insert a blank disc in your PC and click Burn on the software interface to start burning your Xvid files to DVD. You can also burn our Xvid videos to ISO files if you do not require burning them to disc right away.
Part 3. What Is Xvid
Xvid is a video codec library that follows the MPEG-4 video coding standards. It is not a format like MP4 and others, but basically a program that makes use of compression technology in order to save space and facilitate fast transfer speed. Xvid makes use of advanced ASP features like global and quarter pixel motion compensation, MPEG and custom quantization matrices, b-frames, Lumi masking, and trellis quantization. This is free software that is distributed under terms of the General Public License and is thus compatible with all platforms and operating systems where source code can be compiled. Your video file may have Xvid extension but there are many file containers that also have Xvid content. Depending on the container these files may be names. For instance, an AVI container will be named as video.Xvid.avi.
Install Wondershare DVD Creator and enjoy burning your Xvid and other video files to DVD disc or ISO files effortlessly.


Christine Smith
staff Editor
Comment(s)