Home Videos to DVD: How to Transfer Home Movies to DVD Easily
Most of people like to record special occasions in our life, wedding ceremony, graduation ceremony, family reunion, etc. to make our moments permanent. However, shooting home movies is just not enough to keep your sweet memories. To keep those sweet photo and video memories, edit and burn home videos to DVD is definitely the best choice since DVD discs are long lasting and can be enjoyed on any DVD player or TV. You can also send the DVD discs to family and friends to share your life and memory with them.
Part 1. How to Edit and Burn Home Videos to DVD (for Digital Videos)
To burn home movies to DVD, professional Wondershare DVD Creator is highly recommended. With it, you can edit, retouch videos and burn home movies to DVD with customized free DVD menus. If you are using a Mac, the steps are quite similar. Just make sure that you already get the right version and follow the steps to convert home videos to DVD with ease (The steps takes Windows screenshots).

Wondershare DVD Creator
- · Burn home movies in different formats to DVD/ISO/DVD Folder/Blu-ray DVD.
- · Built-in video editor to make your home movies more attractive by trimming, cropping, adding watermarks/effects, and others.
- · Additional toolbox to make photo slideshow, convert DVD to DVD, ISO to DVD, burn data disc, burn DVD to video, One-click to burn DVD/Blu-ray Disc, etc.
- · Offer 100+ free static and dynamic menu templates and customize further with creating chapters, adding background image or music, and more.
- · Adjust home video aspect ratio to fit the player screen better.
- · Burn home movie to DVD/Blu-ray Disc with fast speed and high-quality output.
Watch Video Tutorial to Learn How to Burn Home Movies to DVD with Wondershare Home Movie Burner
Steps on how to edit and burn home videos to DVD with Wondershare DVD Creator:
Step 1 Transfer your home movies to computer.
For digital videos from DVD camcorder, Flash Memory camcorder and Hard drive camcorder: There are a few options which you can choose from to transfer digital videos to DVD. These include Firewire/IEEE-1394, USB, S-Video, or RCA connectors. The most efficient way of doing this is with an IEEE 1394 cable.
Step 2 Add home videos to the DVD Creator.
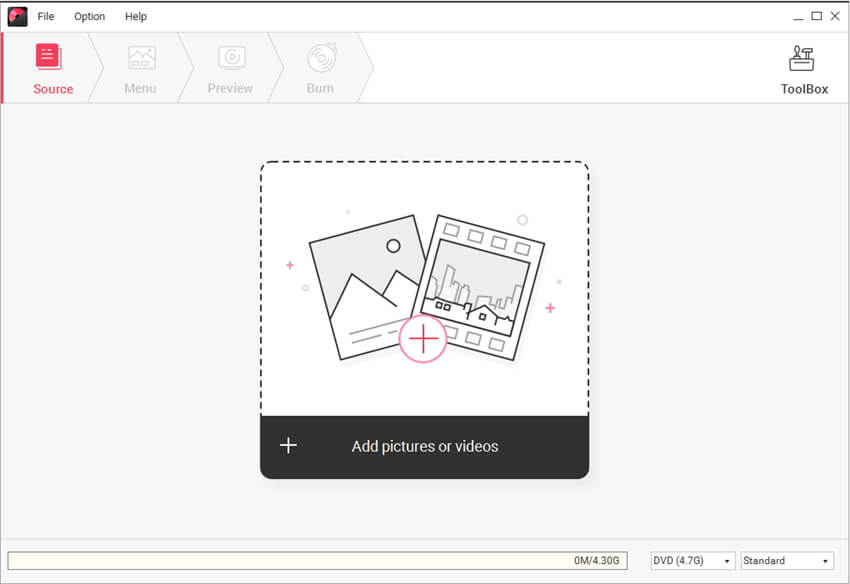
Run this home video to DVD creator and choose Create a DVD Video Disc option. Click " + " icon on the interface to browse and select the videos you want to burn. You can also drag and drop video files to the Source pane to load them. Photo importing is also supported.

Step 3 Edit home video with the built-in video editor. (Optional)
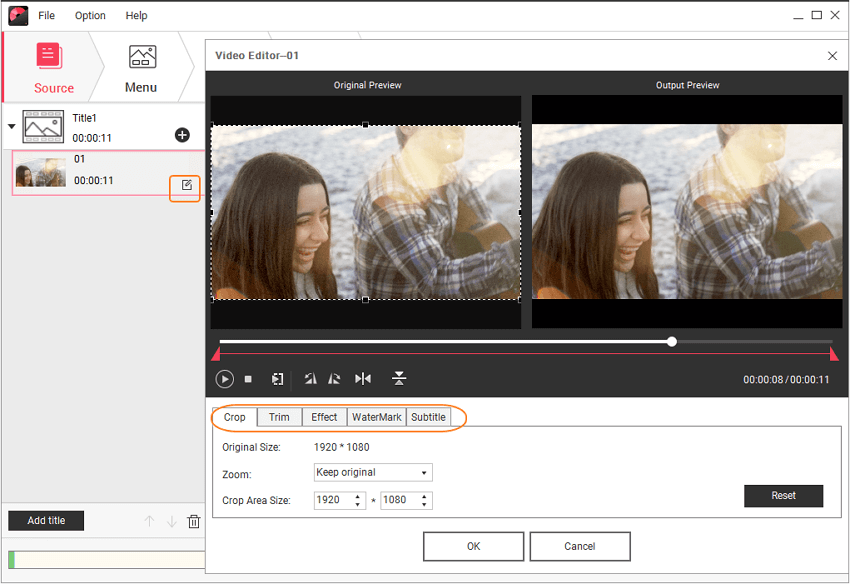
You can preview the added videos as thumbnails on the right and adjust video volume for better effects. Select a video clip and click the pencil-like button to open the Video Editor window, where you can freely customize your videos by cropping, rotating, trimming, adding effects, adding watermarks and so on.

Step 4 Select a DVD menu and customize it for movies to DVD.
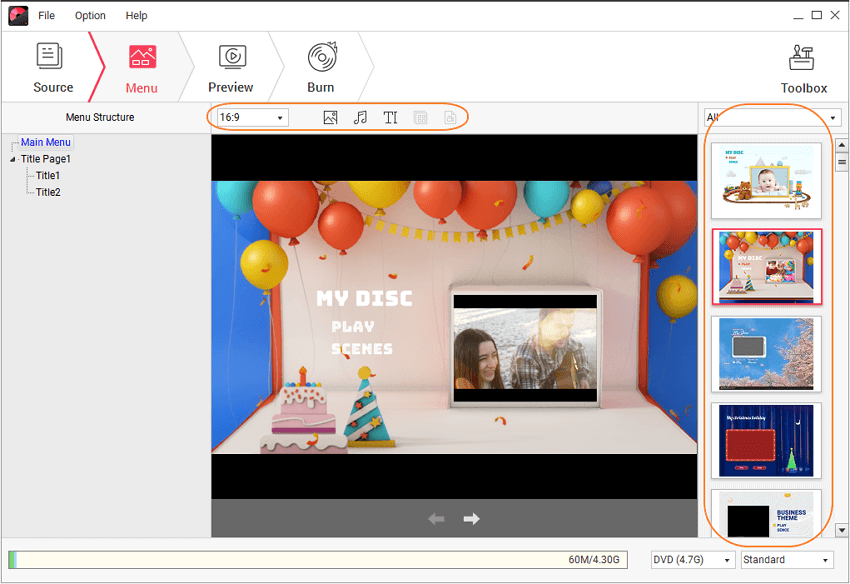
Move to Menu tab and double click to choose from a DVD menu template for your home movie to DVD authoring. Further customization like adding chapters, changing background images and music, editing text and buttons can be made by clicking related icons at the top of the interface.

Step 5 Preview and burn home videos to DVD.
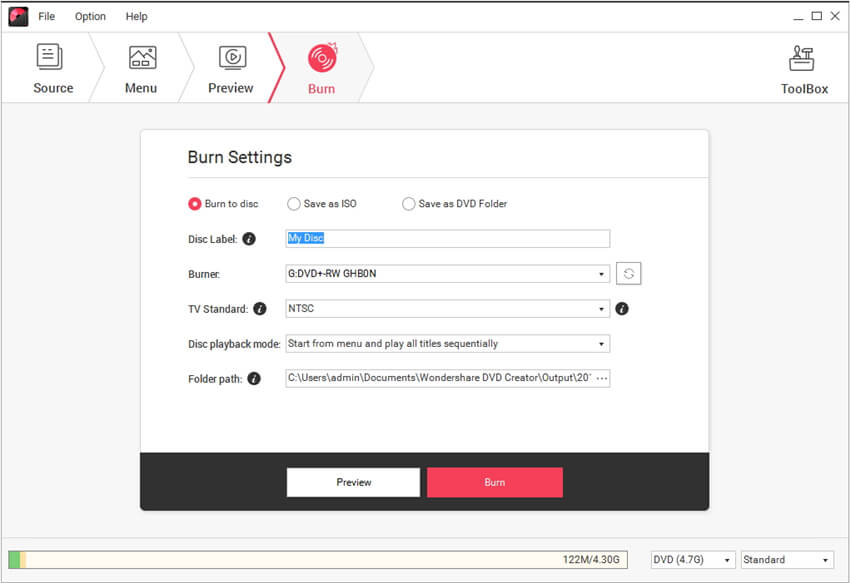
Switch to Preview tab to watch your video in real-time mode. If anything needs to be changed, go to the corresponding tab to make some modifications. When you are satisfied, insert a blank disc into your PC and click the Burn tab. Choose Burn to disc option to complete the Burn Settings such as the disc label, burner, TV standard, disc playback mode, etc. Finally, click Burn to convert home movies to DVD with fast speed and high-quality output.


Part 2. How to Burn Home Movies to DVD (for VHS Videos)
VHS tapes are no longer in use, but if you have some of your special moments saved in VHS videos, convert them to a DVD and relive them. There are different ways to convert home videos to DVD and depending on the number of tapes and needed features you can opt for the solution.
Using a DVD recorder is the most straightforward and simple solution to transfer home movies to DVD if you have a separate VCR and a DVD player with recording feature.
Steps on how to transfer videos to DVD at home using a DVD recorder:
Step 1: First of all, connect your VCR to your DVD player using an RCA cable. These cables generally come with your TV set, DVD player, and cable box. The RCA cable is color-coded- yellow, red, and white which facilitates the transfer of video as well as full audio. Connect the corresponding color outputs of your VCR to the color-coded inputs of your DVD player.

Step 2: Once connected, insert VHS tape into your VCR. Make sure that video head of the VCR is clean. Play and check the video. If entire video of the tape is not needed to be recorded, set it to the starting point as desired. Simultaneously insert a blank DVD disc into your DVD player cum recording unit.
Step 3: Finally, when all set, press the play button on VCR and the Record button on the DVD player. VHS videos will start recording on your DVD disc.

Though above are the standard steps to convert home movies to DVD, check your DVD player manual in case of any additional steps or procedure needed.


Christine Smith
staff Editor
Comment(s)