Helpful Ways to Burn Files to CD with ease
If you want to learn how to burn files to CD, then you should first start with familiarizing yourself with programs that you can use for this purpose. There’s a lot of burner programs out there that will allow you to burn CDs in some shape or form, but a lot of it will depend on what you’re looking to accomplish with your CDs. If you’re just planning to create a regular audio CD, then the first couple of methods we demonstrate down below should work for you. If not, then we also have a way of burning other files onto a CD at the very bottom.
How to Burn Audio Files to CD with Wondershare DVD Creator
For our first CD burner, we have the Wondershare DVD Creator. Which, unlike the rest of the programs we’ll introduce, later on, is actually a premium DVD Creator. That means you can certain to have at your hands, all the tools that you could possibly want or need when it comes to burning audio files onto a CD! You can learn more about the program as we continue with our step-by-step breakdown, but first, let’s talk about a couple of its more key features:
Wondershare DVD Creator
- · Convert videos to DVD/Blu-ray Disc/ISO File/DVD Folder/Data Disc with fast speed and high-quality output.
- · Edit videos with features of cropping/trimming/rotating videos, add subtitle, apply effects, and others.
- · Select to DVD menu with 100+ template design from Movie, Memory, to Travel theme.
- · Customize DVD menu with parameters such as background image, music, text, and others.
- · Additional functions including ISO to DVD, Data Disc, Video Editor, Slideshow Maker, DVD to Video, DVD to DVD, One-click to Burn DVD, etc.
- · Both DVD5 and DVD9 disc are available.
- · Supported OS: Windows 10/8/7/XP/Vista, Mac OS 10.14 (Mojave), 10.13 (High Sierra), 10.12, 10.11, 10.10, 10.9, 10.8, 10.7, 10.6.
- ● Features available for easing the DVD Creation process — like a One-Click DVD Burn feature for copying files onto a CD quickly
- ● Built-in Media Editor for processing your audio, video, and images prior to burning
- ● Advanced controls for personalizing your disc before it is used
- ● Burns files to CDs, DVDs, and Blu-Ray DVDs
- ● Easy-to-use design intended for even the most inexperienced
How to Burn Audio Files to CD
Step One: Select CD Burner
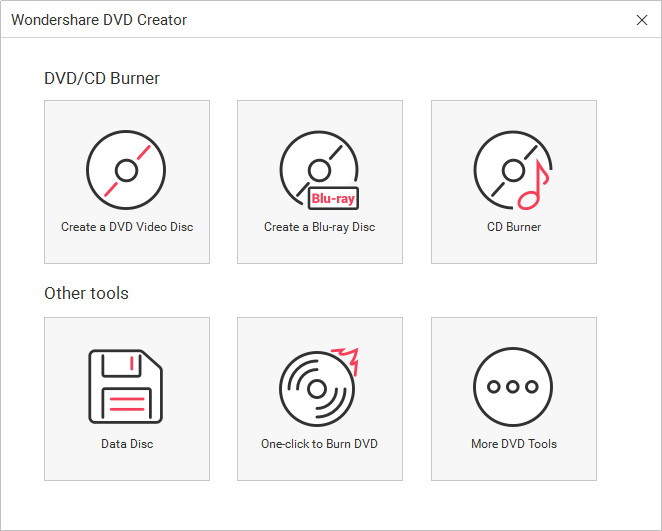
After launching the Wondershare DVD Creator, you’ll be greeted with this menu screen (refer to the image below.) If you want to use the Wondershare DVD Creator to convert MP3 files to a readable CD format, then you need to select the CD Burner option.

Step Two: Add Audio Files
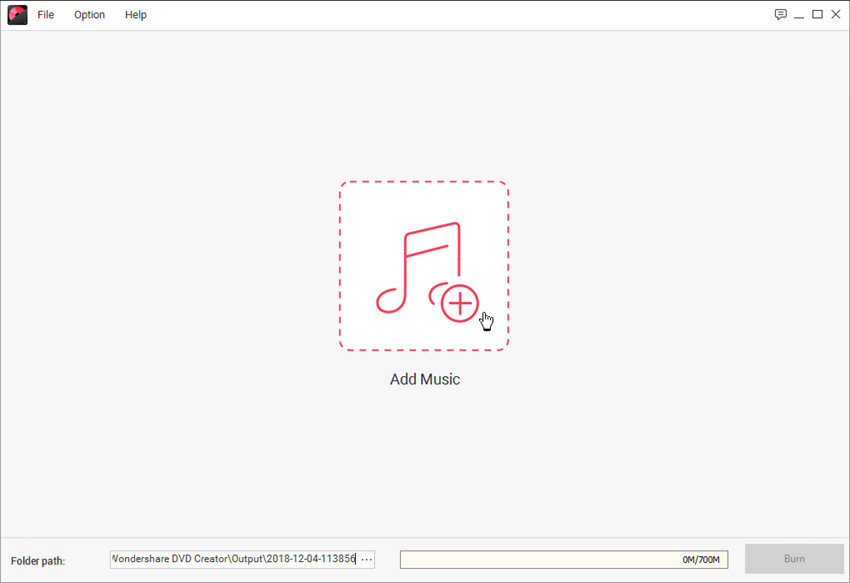
Now you can add the audio files by dragging and dropping or clicking the Add Music button in the middle of the main interface.

Step Three: Burn Audio Files to CD
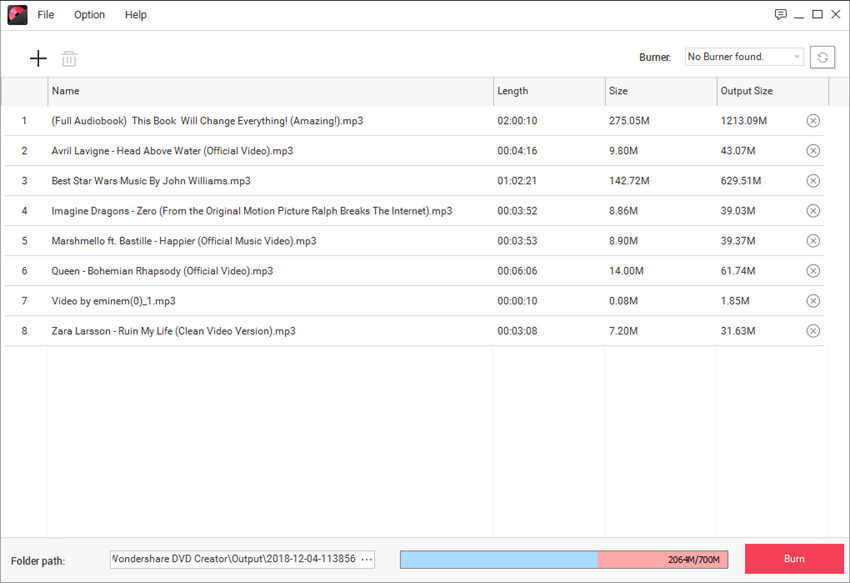
Whem you've made up all the settings, you can click the Burn button at the lower right bottom of the program window to start burning audio files to CD.

Part 2. How to Burn Audio to CD to Mac
Next, we’re going to show you how you can burn audio files onto a CD using a Mac-able software. Namely, the iTunes media player. Of course, as you no doubt already know, the iTunes software is more of a media player — to be used by iOS users in handling the files on their mobile devices. Fortunately, that’s not all there is to it. Apple provides a quick burn feature for people who want to burn their audio playlists onto a CD. Which you can read more about in the step-by-step.
How to Burn Audio Files to CD on Mac
Step One: Create a Playlist to Burn
As we hinted earlier, you can burn audio onto a CD with iTunes by first creating an audio playlist. This part is not so difficult to do. Just select the music you want from the iTunes library, right-click, and then choose the following options: Add to Playlist > New Playlist.

Step Two: Burn Audio Playlist
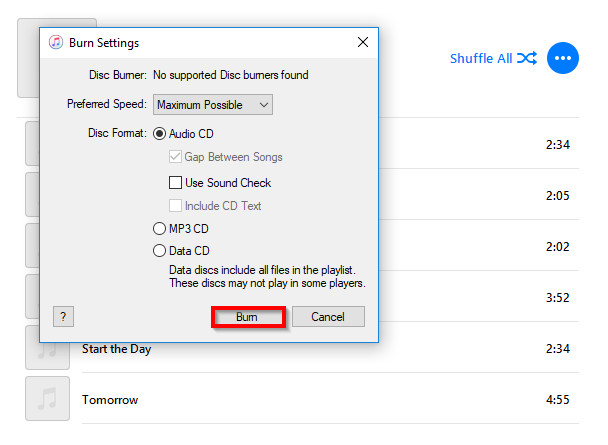
When you’re done creating your audio playlist, open up the File tab, and then locate the Burn Playlist to Disc option. By selecting that, a windows pop-up will appear on your screen (shown in the next step.)

Step Three: Select & Burn
Almost done! You just need to make a couple of choices before you are completely finished.
- ● Preferred Speed: Choose a speed that will suit you the most (just remember that audios tend to be burned in a better quality when you choose a lower speed.)
- ● Disc Format: This is highly dependent on your needs. If you have a lot of files and are not worried about sound quality, then choose MP3 CD. If you do care about sound quality and only have a couple of songs to burn, then you should choose the Audio CD format.
Either way, once you have made your selections, you can finish up by clicking the “Burn” button in the bottom right-hand corner of the window.

Part 3. How to Burn Audio to CD with Windows Media Player
For our final audio to CD demonstration, we’re going to be using the Windows Media Player. It functions almost identically to the iTunes software — at least when it comes to burning CDs. Of course, there is a couple of differences in methodology, but the basics are the same. Learn more about it in the step-by-step provided below.
How to Burn Audio to CD with Windows Media Player
Step One: Burn Audio Files to CD with Windows Media Player
The first thing you have to do is to make sure that your audio is in your Windows Media Player library. From there, you will be able to find the Burn tab in the right-hand side of the screen. Click that in order to move forward.

Step Two: Drag items for your Burn List
Now, you’ll find that a sidebar will slide open in the right side of the screen. On there, there is an area where you can drop items from your Windows Media Library to be burned. Everything you drop there will become your burn list. So be very careful about the audio you put there. Only upload audio you want on your CD.

Step Three: Start Burn
Finish up by clicking the Start Burn button at the top of the side-bar. Know that this option will only be available if you have a blank disc inserted into a driver connected to your PC. So, it’s best to do that before going this far.

Part 4. How to Burn Other Files to CD
For this last portion, we’re going to be teaching you how to burn other files — not just audio, onto your CD. Of course, this is not something that will be compatible with most CD players, but you can use it’s a good way of keeping your precious documents safe. Be it in the form of videos, images, etc.! For this, we’re going to be using the Wondershare DVD Creator once more — this time with the intention of burning a disc with videos and images.
How to Burn Pictures to CD
Step One: Choose Data Disc
Similar to how we started earlier, we’re going to have to choose a disc format. Which, for our purposes — creating a CD with other files, we’re going to be sticking with the Data Disc option.

Step Two: Add Pictures or Videos or Audios
This is where we branch out a bit. Rather than just adding audio files. We’re going to go ahead and click the “+” icon in order to browse our computer for the videos and images that we want to burn onto our disc.

Step Three: (Optional) Customize
As you can see, we filled up the activity screen with all sorts of pictures and videos. All of which can be burned onto your compact disc! And, like before, you can make a couple of customization choices prior to initiating the burn process.
- ● Add or Delete files with the “+” and “Trash” icons.
- ● Name your disc by filling in the Disc Label box.

Step Four: Select your Burner
Once you’re happy with your uploaded files, you can go ahead and select a viable burner from the Burner menu at the top right-hand corner of the screen and then click the Burn button. That’s really all there is to it!

Conclusion:
Burning files to CD, be it audio or otherwise, is very doable. It’s just a matter of finding a burner program that suits your needs. Of course, if you want our recommendation, we suggest trying out the Wondershare DVD Creator. It is, first and foremost, the most helpful of the programs we recommended. You really won’t go wanting for much else with such a premium product.
Wondershare DVD Creator
- · Convert videos to DVD/Blu-ray Disc/ISO File/DVD Folder/Data Disc with fast speed and high-quality output.
- · Edit videos with features of cropping/trimming/rotating videos, add subtitle, apply effects, and others.
- · Select to DVD menu with 100+ template design from Movie, Memory, to Travel theme.
- · Customize DVD menu with parameters such as background image, music, text, and others.
- · Additional functions including ISO to DVD, Data Disc, Video Editor, Slideshow Maker, DVD to Video, DVD to DVD, One-click to Burn DVD, etc.
- · Both DVD5 and DVD9 disc are available.
- · Supported OS: Windows 10/8/7/XP/Vista, Mac OS 10.14 (Mojave), 10.13 (High Sierra), 10.12, 10.11, 10.10, 10.9, 10.8, 10.7, 10.6.


Christine Smith
staff Editor
Comment(s)