

How to Burn Songs to CD easily
Want to learn how to burn songs to CD? There are a couple of methods that you can try out immediately! We have a couple of them listed down below, to offer you a choice on CD-burning programs that will best suit your needs. Whether you’re looking to copy songs to your CD on a Windows or Mac PC. So, give it a scroll, and see if any of these methods will work to suit your needs.
Part 1. Most Helpful Way to Burn Songs to CD on Computer
Wondershare DVD Creator is the first program that we’re going to introduce you to. It’s a Mac/Windows software that, as you can probably guess from the name, is a program that is made for creating DVDs and CDs. Of course, as a premium program, it offers a lot more in tools and features than the other programs on our list. But despite these advanced features, it manages to be highly intuitive and perfect for beginners! Some of its more main characteristics include:
Wondershare DVD Creator
- ● Built-in Slideshow Maker for creating slideshows with images and audio
- ● Multi-media processing in various file extensions — including a variety of audio file extensions (MP3, AIFF, FLAC, WAV, APE, etc.)
- ● Burns Audio CDs with both uncompressed and compressed audio
- ● CDs are always burned at the best speed — a default speed set up by Wondershare
- ● Beginner-Friendly interface that maximizes ease-of-use and intuitiveness
How to Burn Songs to CD on Computer
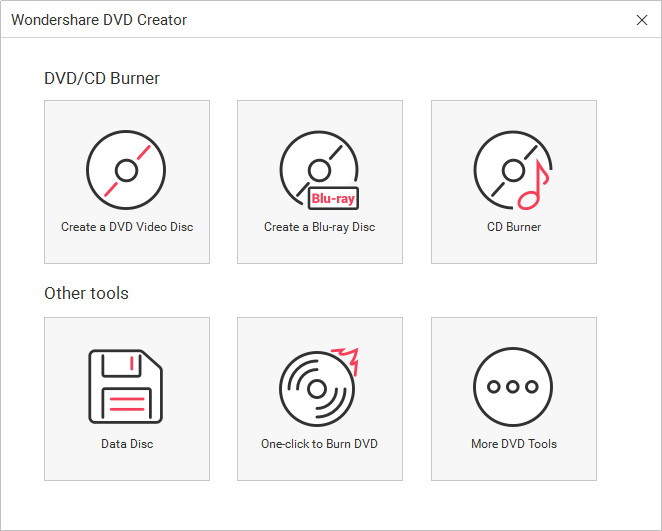
Step One: Launch Wondershare DVD Creator & Select CD Burner
Open Wondershare DVD Creator and wait till the welcome menu in the image below appears below. This is the first step of the process, wherein all you have to do is select the type of project you want to work on. For burning songs onto a CD, we’re going to be picking the CD Burner type for our project.
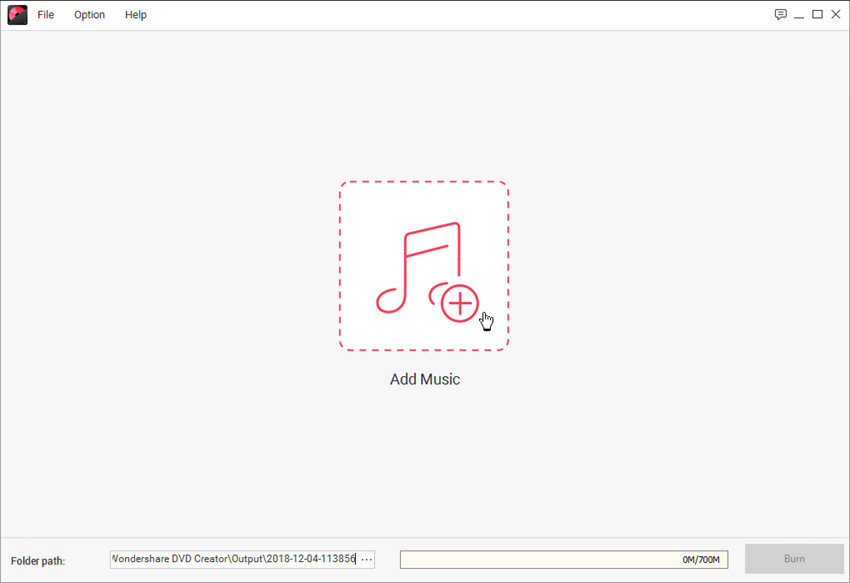
Step Two: Add Songs to be Burned
For step two, you’re going to be prompted to add the files that you want to burn onto your disc. Wondershare allows multi-media processing, so you can upload just about anything (be it audio, images, or videos.)
- ● You can add the songs you want to be burned simply by dragging and dropping them onto the screen.
- ● OR you can just as easily browse your PC for the songs after clicking the “+” options.
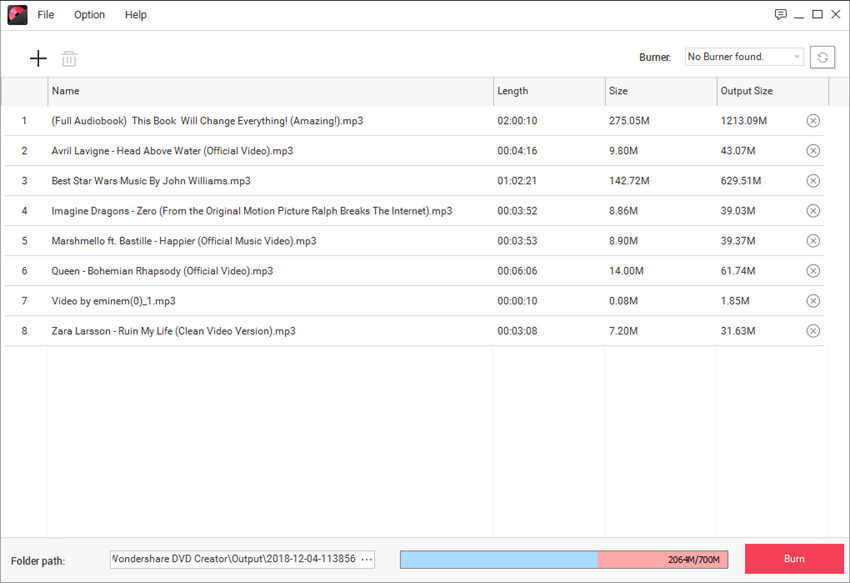
Step Three: Organize Your Songs & Start Burning
After adding all the songs you want into the program window, you're allowed to organize the order of the songs by dragging the songs to the place you want. When you finished making up all the settings, you can click the Burn button at the lower right bottom to start burning songs to CD.
Part 2. How to Burn Songs to CD on Mac
Outside of CD/DVD burning programs, you can also take advantage of built-in PC features. Like the CD burning software build-into Mac PCs. These features tend to be highly simplified, not necessarily fit for creating long-lasting CDs. But it can do the job for you in a pinch. An added bonus would be that you wouldn’t have to download or install anything.
How to Burn Songs to CD on Mac
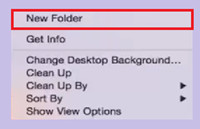
Step One: Create a Folder for Songs
In order to be able to burn songs onto a CD, you’re going to have to create a folder just for the songs that you want to copy onto your CD. Create a New Folder on Mac by right-clicking on an empty spot on the desktop and choosing the New Folder option on the drop-down menu that appears (shown in the image below.)
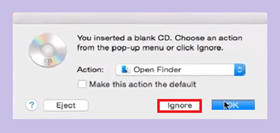
Step Two: Insert Disc for your Songs!
Next, you need to insert the blank disc you want to copy your songs on to the driver/burner connected to your PC. You’ll have to give it time to process, but a pop-up menu (shown in the image below) should appear. You can ignore this pop-up menu, simply click “Ignore” and move on.
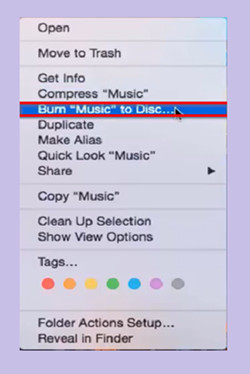
Step Three: Music Folder
Going back to the folder that you created in step one with your songs on it. You’re going to have to right-click the folder and choose the Burn “_(Folder Name)_” to Disc… option on the drop-down menu that appears.
Step Four: Choose Settings and Burn!
This is the final pop-up that you’re going to have to deal with. On it…
- ● Disc Name: Type in the name you want your disc to have in the box provided.
- ● Burn Speed: Choose a speed that suits your needs most (faster speeds equal instant gratification, but it might result in CDs that wear out over-time.)

Part 3. Burn Songs to CD with Windows Media Player
For the third method, we’re going to be using the Windows Media Player. This software is built-into Windows OS computers but will need a bit of installation before you can use it to burn your songs onto a CD. One note about this method, it’s best to have your disc already inserted into the driver/burner connected to your PC — to prevent any errors that will require you to restart the whole process.
How to Burn Songs to CD with Windows Media Player
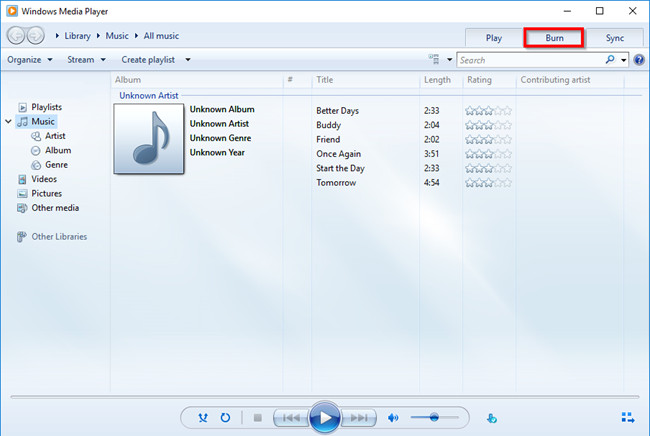
Step One: Burn Tab
If you look at the top right-hand side of the computer, you’ll find the Burn tab button. Click that to activate the sidebar shown in the next step.
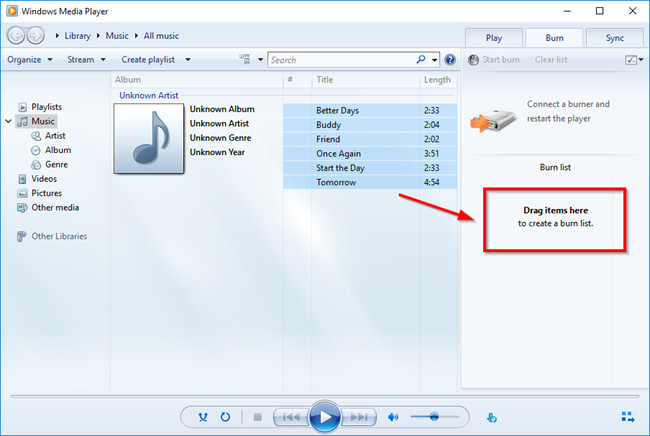
Step Two: Create a Burn List
On the side-bar that appears on your right, a dock will be able for you to create what Windows Media Player calls a Burn List. There, you can drop music from your Windows Media Player that you want to copy to your PC.
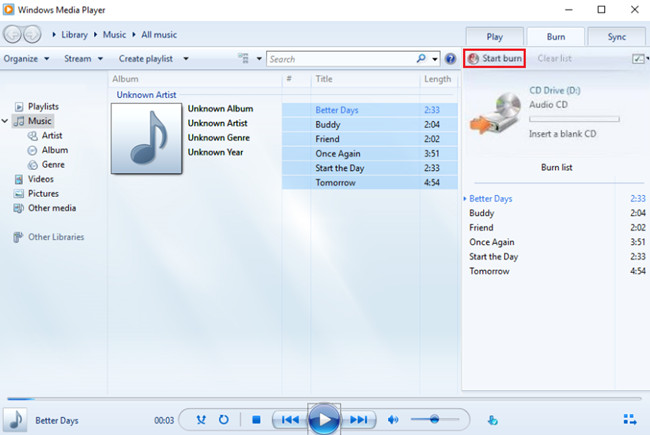
Step Three: Burn your Burn List
Once you have your burn list already to go, you can click the “Start Burn” button to start the active copying of your songs onto the blank disc you prepared.
Part 4. Tips & Tricks about Burning Songs to CD
To help you master the process of burning songs to CD as best as we can, we’ve listed out three important tips and tricks that you should know. These tips and tricks will just be covering the basics, and only for music-to-CD burning. For this, we’ve used the Wondershare DVD Creator as an example. Which we’ll explain as we continue with our list.
Tip 1. What are CD Types?
One thing that’s important to consider when burning CDs, is the type of CD you’re creating. Believe it or not, there is more than one type of audio CDs. The term Audio CD itself refers to a certain type of audio disc — specifically, a CD that uses high-quality audio files. On the other hand, you have MP3 CDs, which are discs describe to use lossy audio files. Tip two and three should explain how these different files will affect the disc you create.
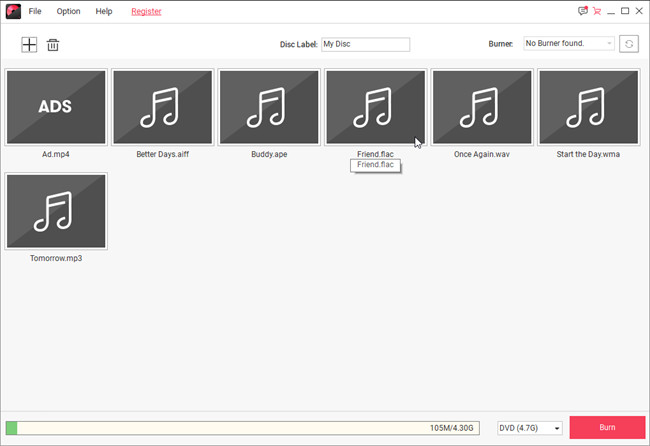
Tip 2. What is Compressed Audio?
Compressed audio, also called lossy audio, is music files that have been compressed. Audio compression is done to reserve space. If you look at the picture below, you’ll see that these compressed tracks take up 18MB altogether (which is less when compared to the screenshot in Tip 3.) An example of compressed audio is an MP3 file. These don’t tend to take up much space — which is why they’re so popular. The compression doesn’t make the audio awful. In fact, it’s serviceable for most people, but there’s certainly a different in quality.

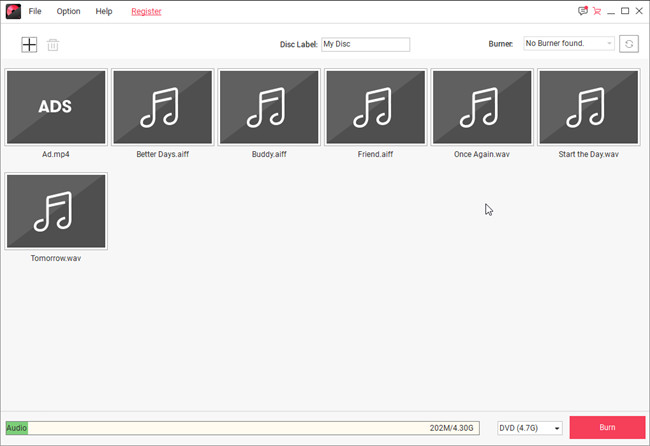
Tip 3. What is Uncompressed Audio?
On the other hand, we have uncompressed audio, also called lossless audio files. Audio files that are left uncompressed tend to take up a lot of space. As an example, the six lossless audio files shown in the image below take up 202MB altogether (which is definitely a lot more than what was shown in the screenshot for Tip 2.) Examples of lossless audio files are AIFF and WAV. There are also half-compressed audio files like FLAC. In either case, there is an obvious jump in quality between lossless audio and lossy audio.
Conclusion:
In the end, you can burn pretty much any song on a disc! It doesn’t matter if you use lossless or lossy audio files, you’re unlikely to see any difference. But, just in case you do want to use one or the other, then we recommend using the Wondershare DVD Creator. It’s the only program in the methods that we’ve listed that will allow you to burn any type of audio onto a disc.
Wondershare DVD Creator
- ● Built-in Slideshow Maker for creating slideshows with images and audio
- ● Multi-media processing in various file extensions — including a variety of audio file extensions (MP3, AIFF, FLAC, WAV, APE, etc.)
- ● Burns Audio CDs with both uncompressed and compressed audio
- ● CDs are always burned at the best speed — a default speed set up by Wondershare
- ● Beginner-Friendly interface that maximizes ease-of-use and intuitiveness


Christine Smith
staff Editor
Comment(s)