

Burn Music to CD on Mac with All Methods
Are you a Mac user looking for a way to burn music to a CD on your Mac Computer? Well, then we have a couple of introductory programs that we’re going to be introducing to you! Four — to be exact. Each of which is available on both Mac and Windows OS. Which should allow you to burn whatever music you might want on a CD using your Mac computer.
Recommended - Wondershare DVD Creator
- • Easy and Quick One-Click Burn Feature
- • Advanced Video Editing Tools and Slideshow Creator Built-in
- • Videos, Images, and Audios can be processed into CD
- • Burns Audio onto disc in Hi-Fi
- • Produces DVDs, Blu-Ray DVDs, CDs, Data Discs, etc.
Part 1. How to Burn Music to CD on Mac with iTunes
The first program that we’re going to be demonstrating is iTunes. It’s the regular media player for people who have iOS mobile devices. Of course, much like most of the popular media players these days, it offers a music to CD burn feature — which is available for both Windows and Mac OS versions of the program! There’s really not much of a difference between either, so once you know how to burn music to CD on Mac with iTunes, then you know how to burn Mac to CD on Windows with iTunes as well.
How to Burn Music to CD on Mac with iTunes
Step One: Create a Playlist with iTunes
The first thing you have to do to use iTunes as a CD/DVD burner is to create a Playlist. This playlist is what is going to be burned onto the disc, so make sure that you create the playlist with that in mind. Create a Playlist with iTunes by importing audio on iTunes library then selecting the audio, right-clicking, and choosing Add to Playlist > New Playlist.

Step Two: File Tab
Next, open up the File tab and locate the Burn Playlist to Disc option. Doing that will allow you to move along with us to the next step.

Step Three: Burn Settings Window
If you do the previous step successfully, then the Burn Settings window should appear on your screen. There are only a couple of things to think about here:
-
● Preferred Speed: Choose a speed that you’re comfortable with, just know that choosing a slower speed should help make your CD longer-lasting.
● Disc Format: Choose Audio CD if you want to burn high-quality uncompressed audio, choose MP3 CD if you want to burn compressed audio that take up less storage space, or choose Data CD if you want to create a multi-faceted disc.
When you’re ready, click the “Burn” button to finish copying your audio onto a CD.

Part 2. How to Burn Music to CD on Mac with VLC
The method of burning music to CD on Mac with VLC is nearly identical to the iTunes method we just demonstrated. There are minor differences, of course, but a lot of the concept is the same. Including the fact that VLC is available on both Mac and Windows — allowing you to use the program in both types of PCs in order to burn your music onto a CD!
How to Burn Music to CD on Mac with VLC
Step One: Create a Playlist with VLC
First, you need to create a playlist on VLC! This playlist should have only the audio that you want to burn onto the CD — nothing more, so be very careful about what you put into it. Create a Playlist with VLC by dragging and dropping audio onto the VLC playlist dock. (If the dock is not showing on your screen, you can activate it on the View tab.

Step Two: Media Tab
Next, you need to open up the Media tab drop-down menu (shown in the image below.) On there, you’ll find the “Convert/Save” option. Select that and move onto the next step!

Step Three: Open Media Window
We’re close to the end now, all you have to do is follow the set of instructions laid out - Open up the Disc tab, select Audio CD under Disc Selection, browse for your burner of choice under Disc Device, and then click “Convert/Save” to finish copying your music onto a CD with VLC.

Part 3. How to Burn Music to CD on Mac with Third-Party CD Burner
For our third demonstration, we’re going to be introducing you to the CDBurnerXP. The CDBurnerXP is a third-party burner, one that you can use in both Mac and Windows OS computers. It’s really not all that different from other CD burners out there, and it manages to be fairly intuitive in the very beginning! Continue reading to learn more about it.
How to Burn Music to CD on Mac with CDBurnerXP
Step One: Launch CDBurnerXP and Select Project Type
Upon launching the CDBurnerXP, you will be greeted by a welcome menu where you will be given a choice as to how you want your project to go (see image below for the options). For burning music to CD, we’re going to stick to the Audio Disc type of project.

Step Two: Add Audio Files
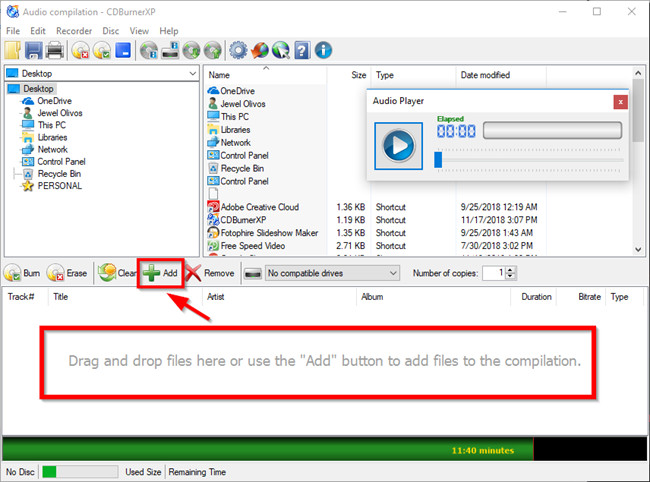
The activity screen for the CDBurnerXP is a little confusion, but you really don’t have to worry too much about much of it. Just click the big green “+ Add” icon highlighted in the image below OR drag and drop files onto the highlighted area near the bottom of the activity screen.
Step Three: Search for Compatible Drive & Burn
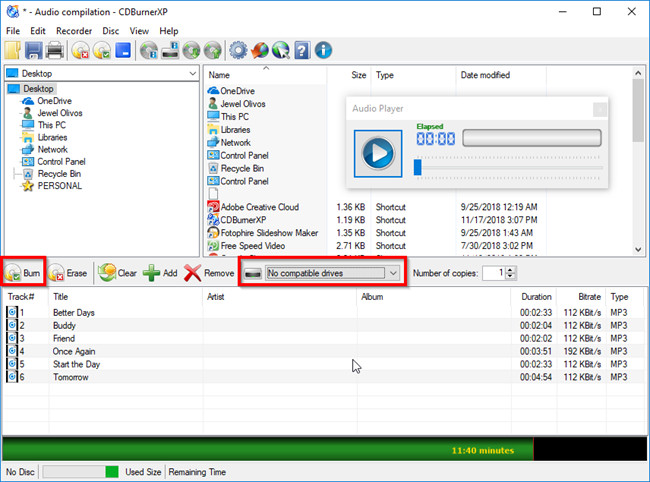
Next to the “Add” and “Remove” icons is the driver menu (highlighted in the image below). There, you’ll be able to select from a list of drivers connected to your computer. Make sure to select one that has a blank disc inserted into it before clicking the “Burn” button — which initiates the permanent copy of your music to CD.
Part 4. Recommended CD & DVD Burner for Windows and Mac Computer
Now that we’ve discussed a couple of different methods that you can try to use for burning music to your CD, let’s talk about our recommended CD and DVD burner. That is, the Wondershare DVD Creator. It’s a premium product, one that is made for creating DVDs and CDs. Unlike the CDBurnerXP however, you get an interface that is beginner-friendly. Everything is designed to work with even the most inexperienced of users — even the premium tools not available in most other CD and DVD burners.
Wondershare DVD Creator
- • Easy and Quick One-Click Burn Feature
- • Advanced Video Editing Tools and Slideshow Creator Built-in
- • Videos, Images, and Audios can be processed into CD
- • Burns Audio onto disc in Hi-Fi
- • Produces DVDs, Blu-Ray DVDs, CDs, Data Discs, etc.
How to Burn Music to CD with Wondershare DVD Creator
Step One: Launch Wondershare DVD Creator & Select CD Burner
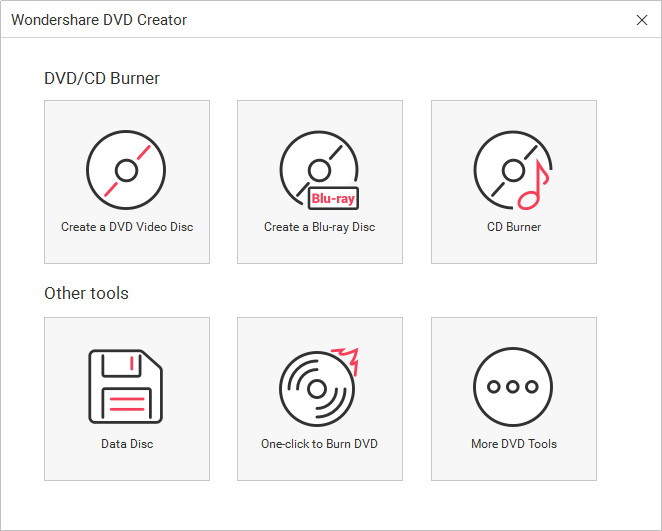
When you launch the Wondershare DVD Creator, you will be given a choice between a variety of disc types (see image below for options). For burning music to CD, we’re going to select the CD Burner option.
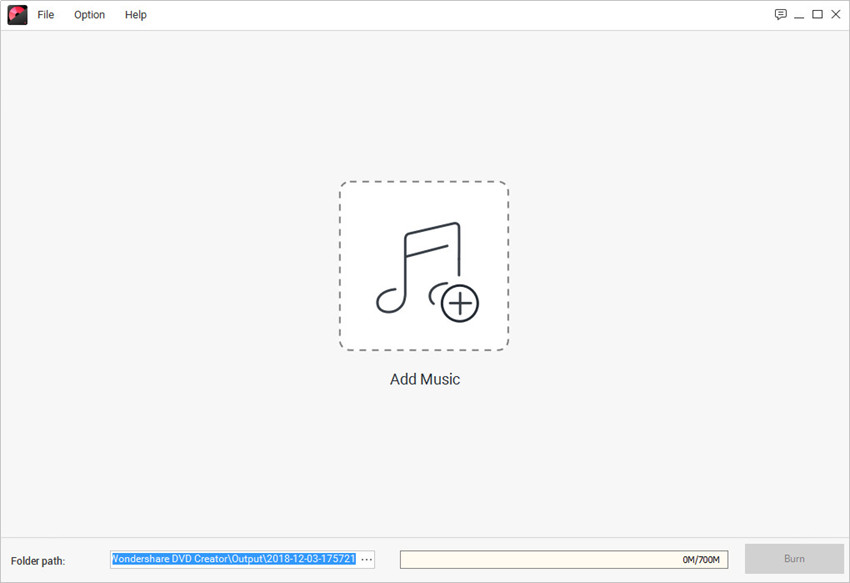
Step Two: Add music
Next, you’ll be moved to an activity screen where you will be able to add files to burn. Now you can add the audio files to program with following methods:
- ● Add your music to Wondershare by dragging and then dropping them onto the screen.
- ● You can also add your music by selecting the “+”/“Add Pictures or Videos or Audios”
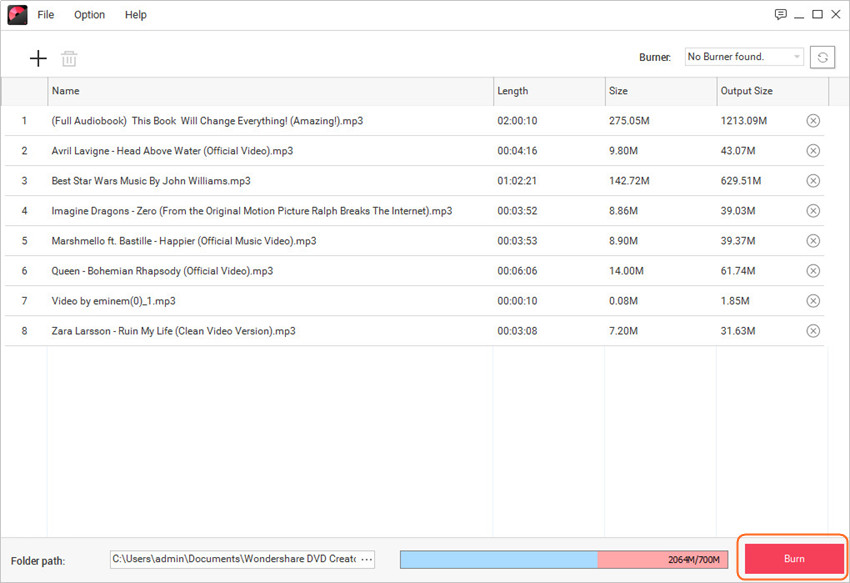
Step Three: Start Burning Music to CD
When you've added audio files to Wondershare DVD Creator, you're allowed to arrange the order of the songs. After all the settings, you can click the Burn button at the lower right bottom to start burning music to CD.
Conclusion:
That concludes our burn music to CD on Mac breakdown! There are lots of DVD/CD burners that you can use out there, and some of them are just easier to use than others. Out of all of them, the program that we’d most recommend is the Wondershare DVD Creator. With its beginner-friendliness and premium tools and features, it is no doubt the most helpful method of those that we discussed.


Christine Smith
staff Editor
Comment(s)